Introduction
At the current moment Google Search Console allows you to reindex only 1 page at a time and up to 10 pages a day. That is too little in comparison to how many URL-s a SEO-specialist needs to reindex for different projects.
Yandex has a “Reindex pages” tool, that helps to reindex many pages at the same time (the quantity depends on the size of your web-site). But Google doesn’t have a direct analogue.
But what if I tell you about an opportunity to reindex up to 200 web-pages in Google every day. Sounds tempting, doesn’t it? What is going to help us is Google Indexing API. It is the very script that allows to send up to 200 pages a day.
There are several ways to use Google Indexing API:
- through plugins for variable CMS
- through a script for a desktop
In this article we’re gonna tell you exactly about the script for a PC as it is a universal way for any site. So these are what we need to use it:
- Create a project and a service account in Google Cloud Platform
- Connect your service account to Google Search Console and plug Indexing API in
- Set up the script for the work Google Indexing API
- Launch and example of using script for indexing of pages in Google
Don’t worry, all the setting is made only once, later you need to edit “urls” file with links inside and run the script only.
Creating project and service account in Google Cloud Platform
So let’s start with setting up the access in Indexing API console. First of all we need to create a new project in Google Cloud Platform:

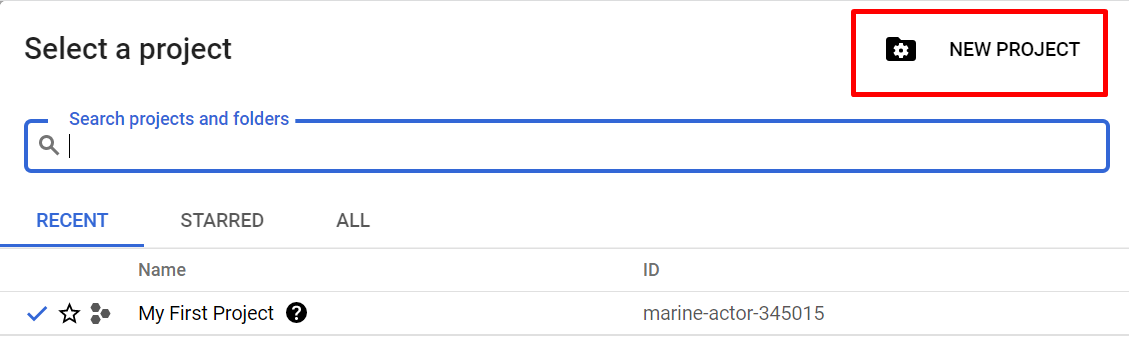
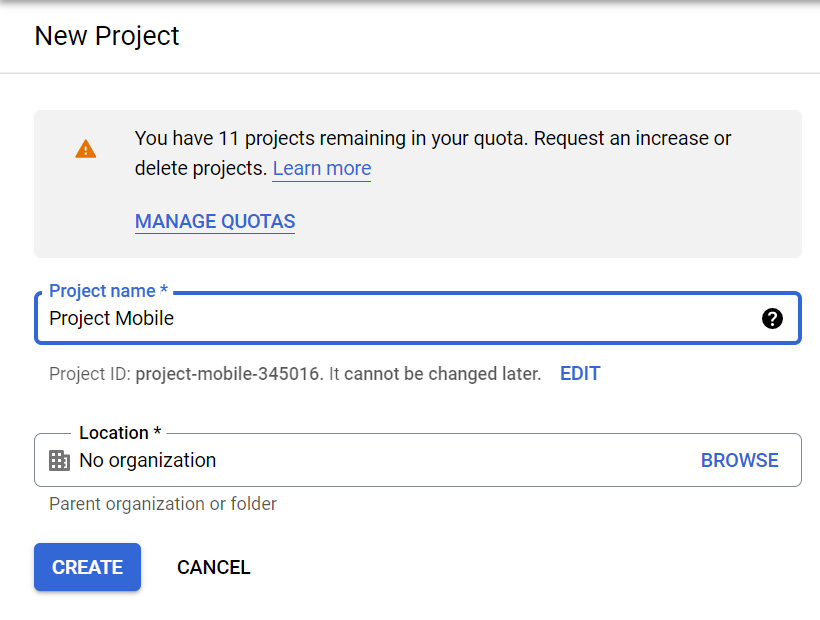
In a new window you fill in the “Project name”, that can be absolutely anything, your web-site name for example. The “Location” column can be skipped. Then you click on the “Create”:
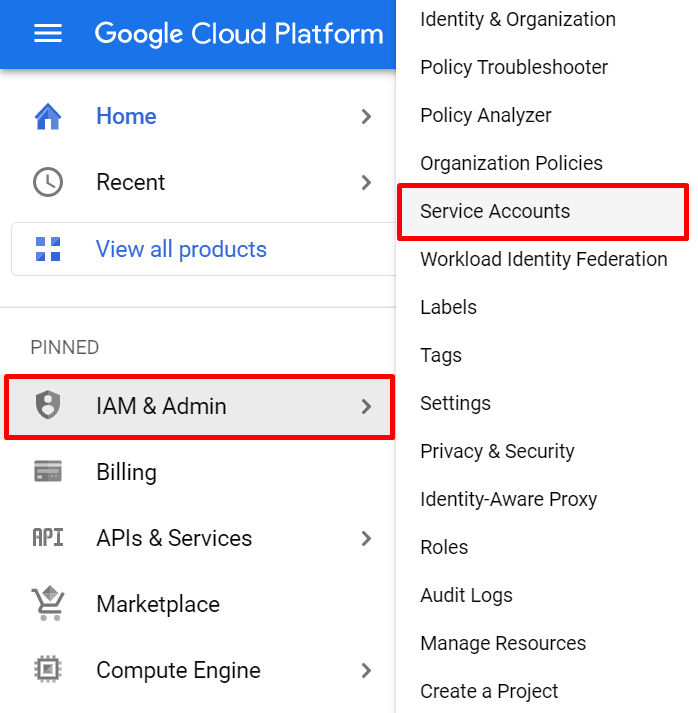
After that you need to go to the section “Service Accounts” which is in “IAM & Admin” tab:
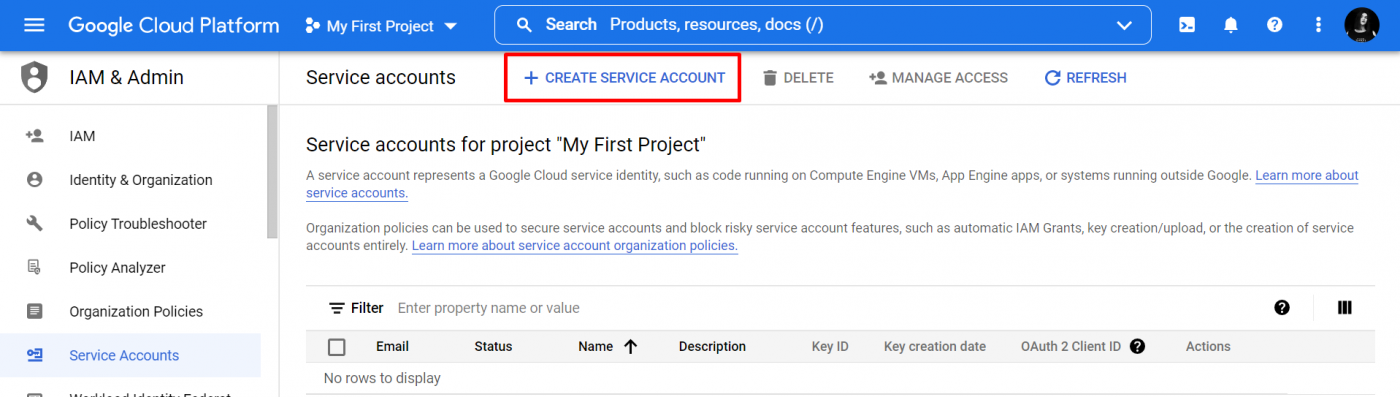
In this window we are creating a service account. Click on the “Create Service Account”:
«Service account ID» и «Email address:». So, here we need to fill in the “Service account name” with your project name. Data in the next lines will be filled automatically:

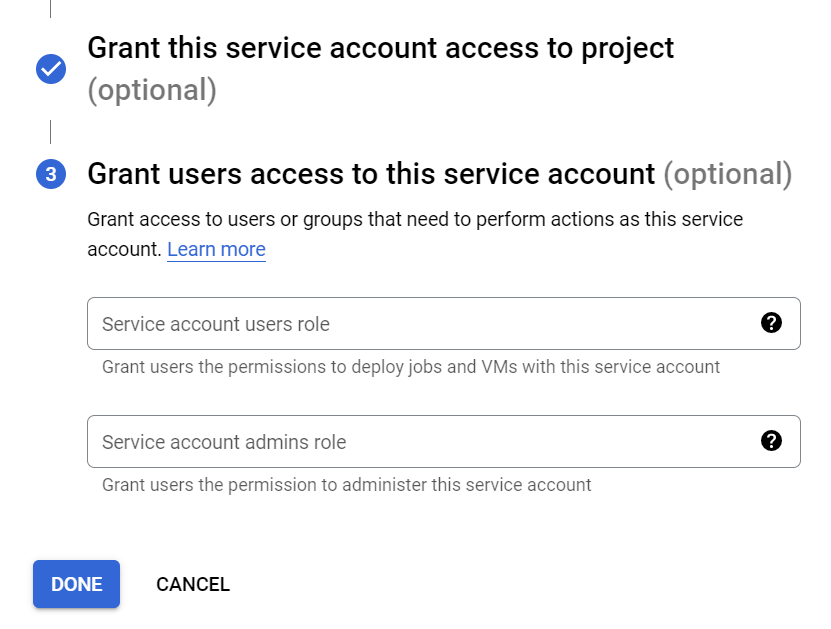
After the creation we need to choose the role. We select the “Owner” in our case:
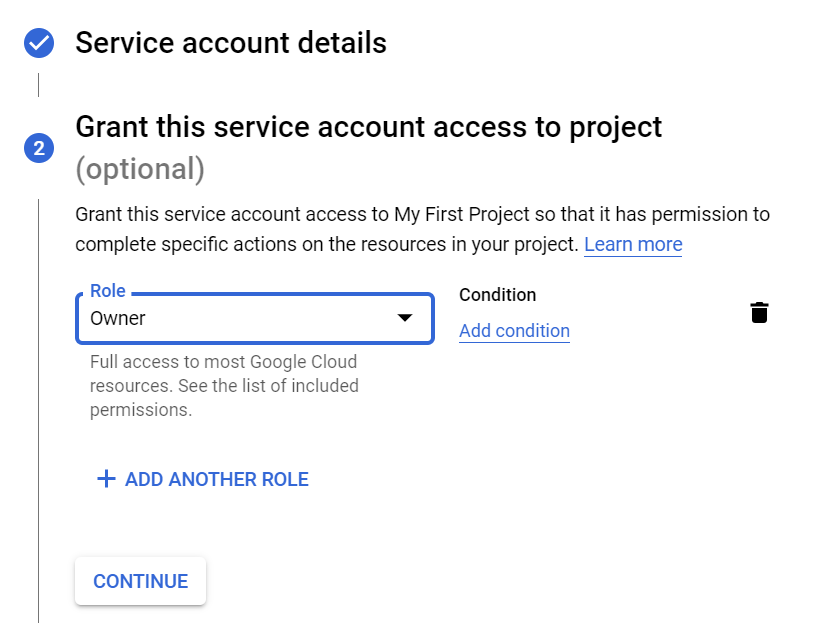
You can enter nothing on the last step and skip it by clicking on the “Done”:
Now in the appeared window you need to create a key. To do it you click on the three dots icon in the “Actions” column and select “Manage keys”.
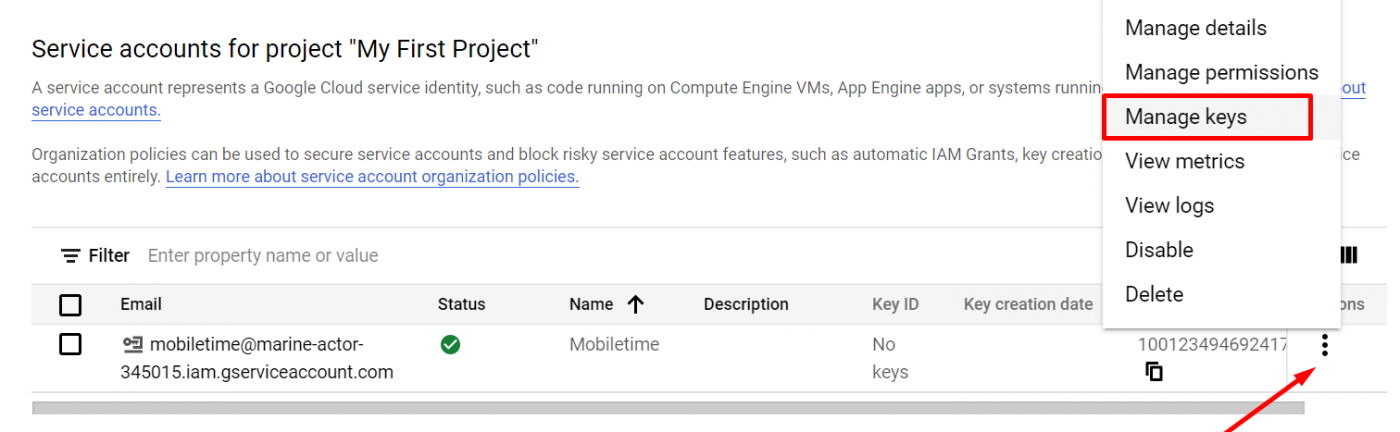
Here we select «Add key», and then «Create new key».
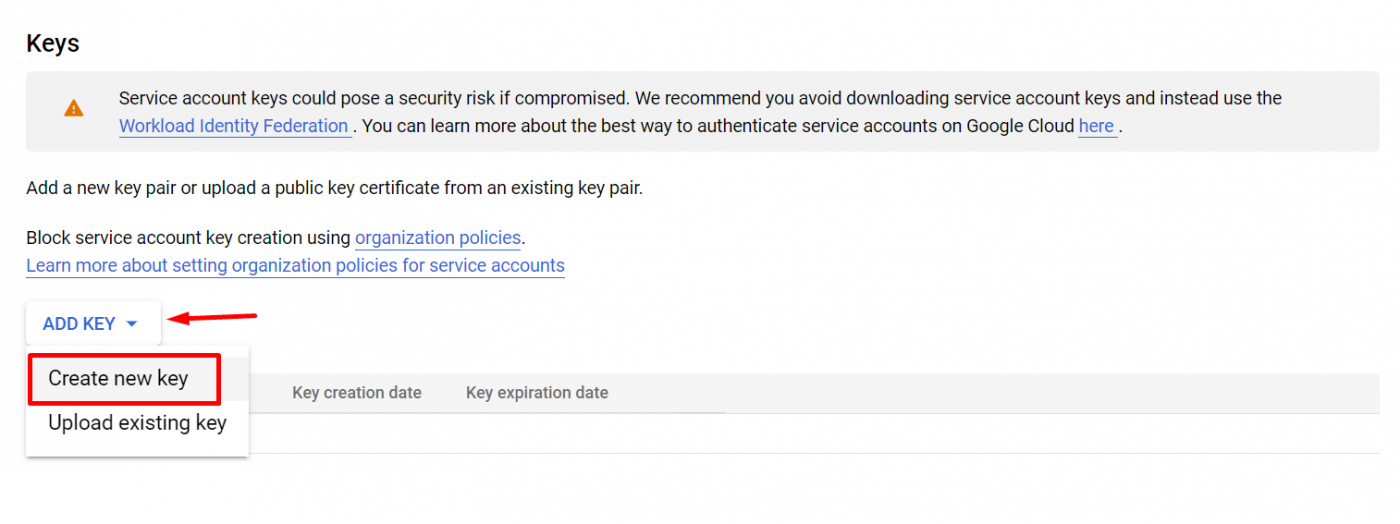
The last thing to choose is the type of the key. It’s JSON in our case.
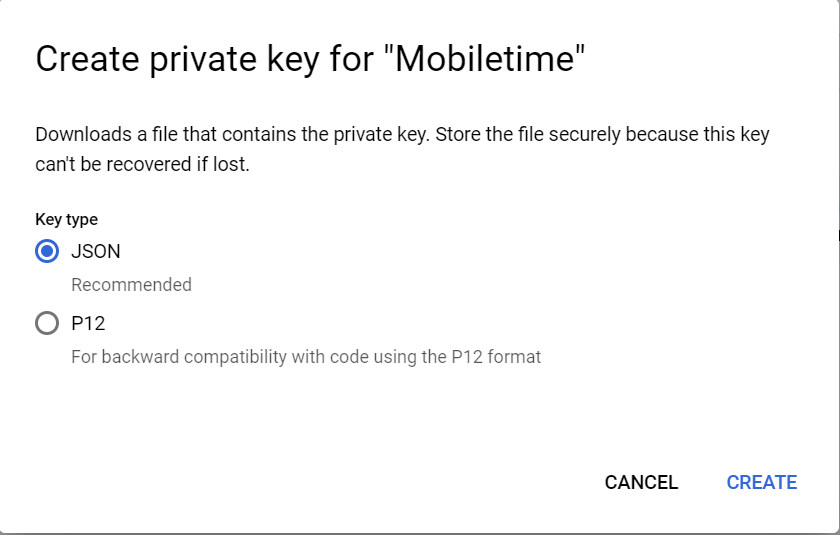
The key will be downloaded on your desktop. It looks like that:

Note
One project can have several service accounts for each of your web-sites. But the 200 URL-s a day limit is required exactly for the project. So you can’t index 200 URL-s every day for every site with connected service account. In order to get around this restriction you can create new projects.
Link of Service account and Google Search Console. Joining Indexing API.
This step’s gonna show you how to link your service account with Google Search Console as well as how to log in Indexing API.
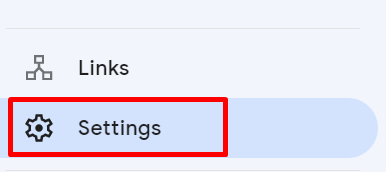
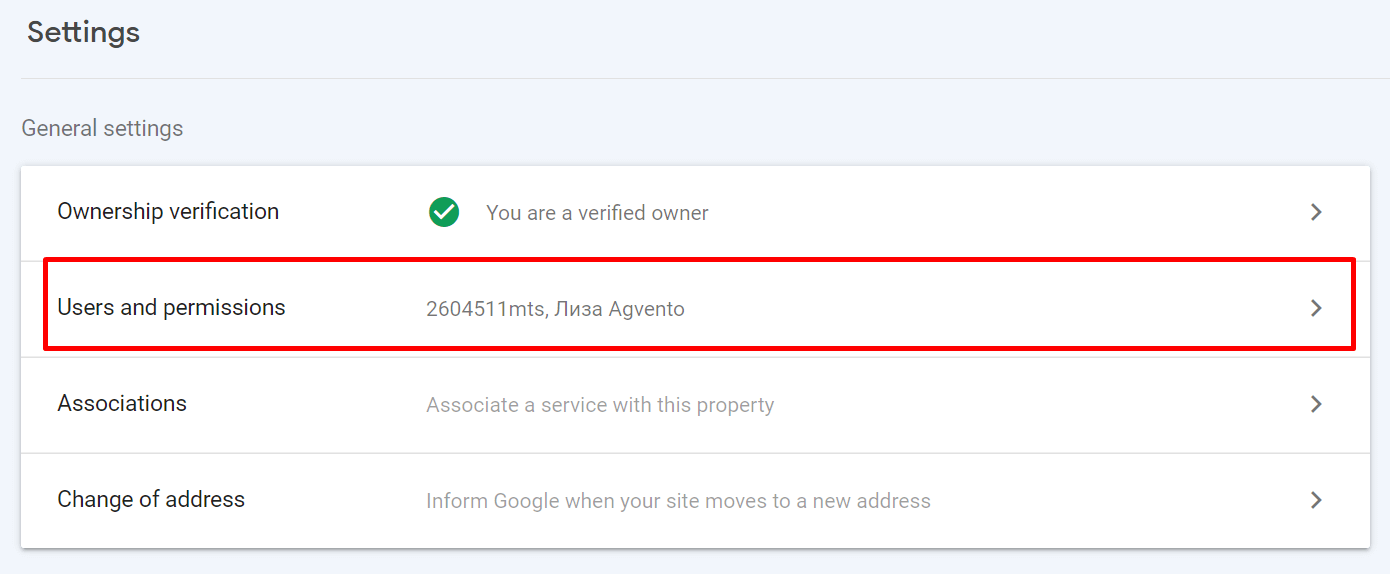
First of all we open Google Search Console and select the web-site we need. The choose “Settings” in the menu. After that you click on “Users & permissions”.
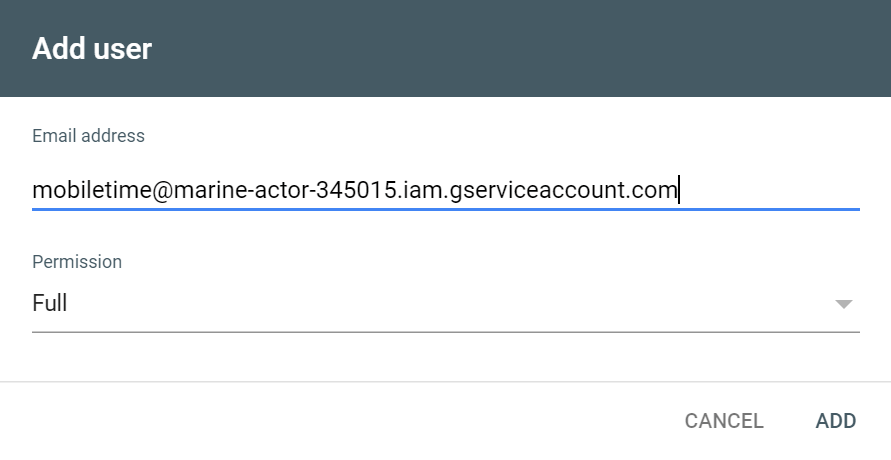
Here we add a new user.
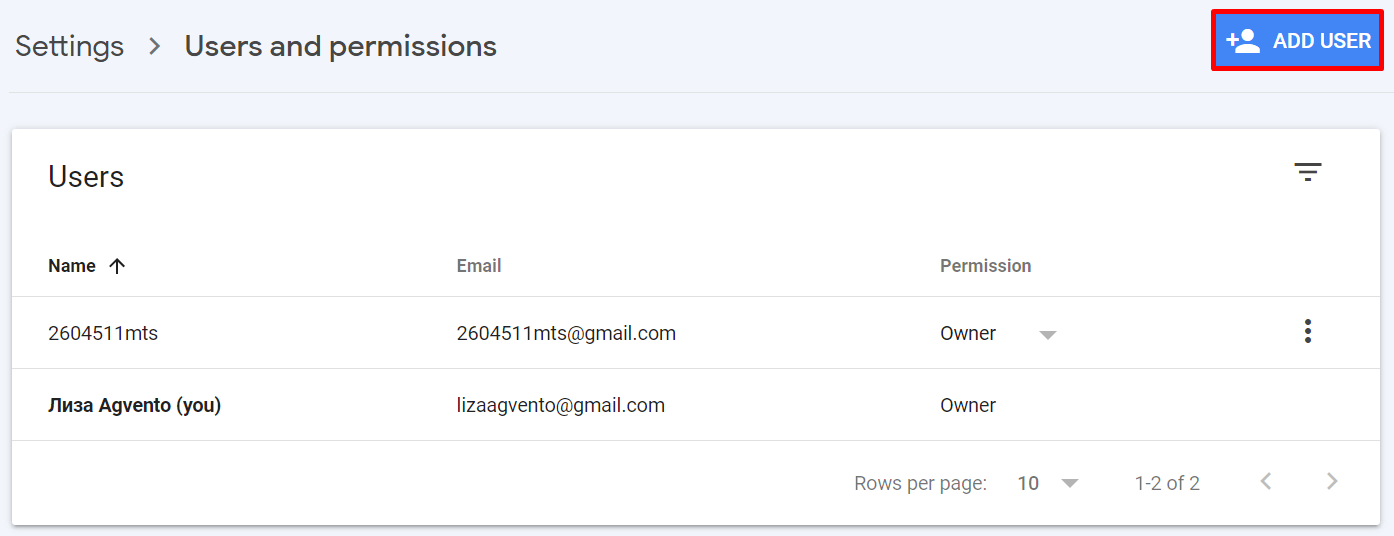
Enter your email in the new window (the same as on your service account in Google Cloud Platform). In permission you choose “Full control”. After that you click on “Add”.
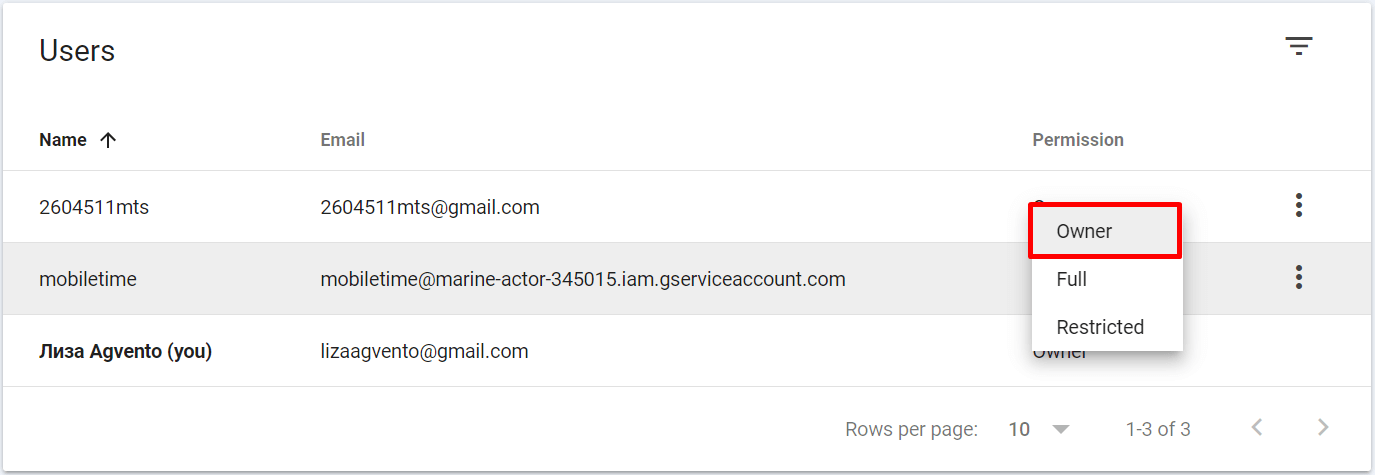
Then you click on the arrow icon on the right and choose “Owner” instead of “Full control”.
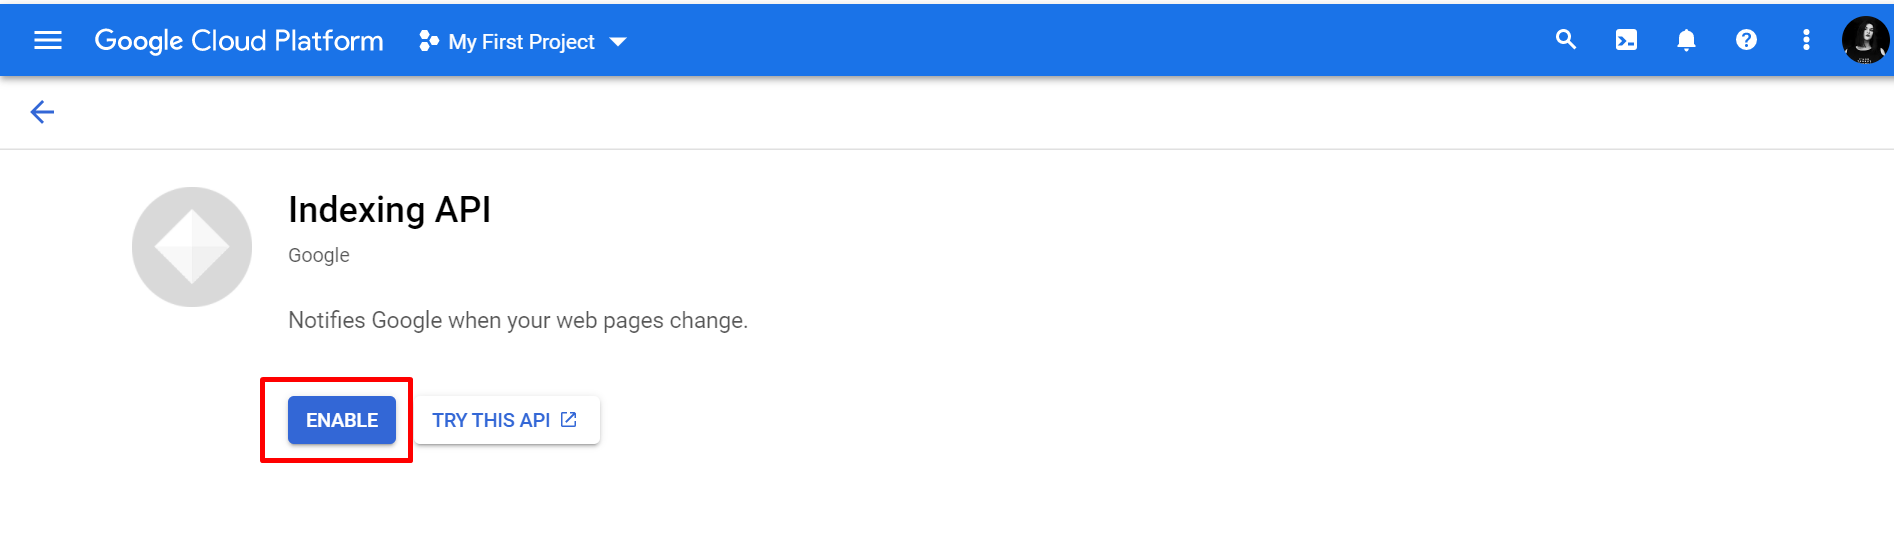
After you did that things above you need to turn Index API on. Follow the link to do it: console.developers.google.com/apis/api/indexing.googleapis.com/overview?pli=1
Select the new account (if you’ve got several) and click on “Enable”.
So, everything is done to use the script.
Setting the script to work with Google Indexing API (on the example of Windows)
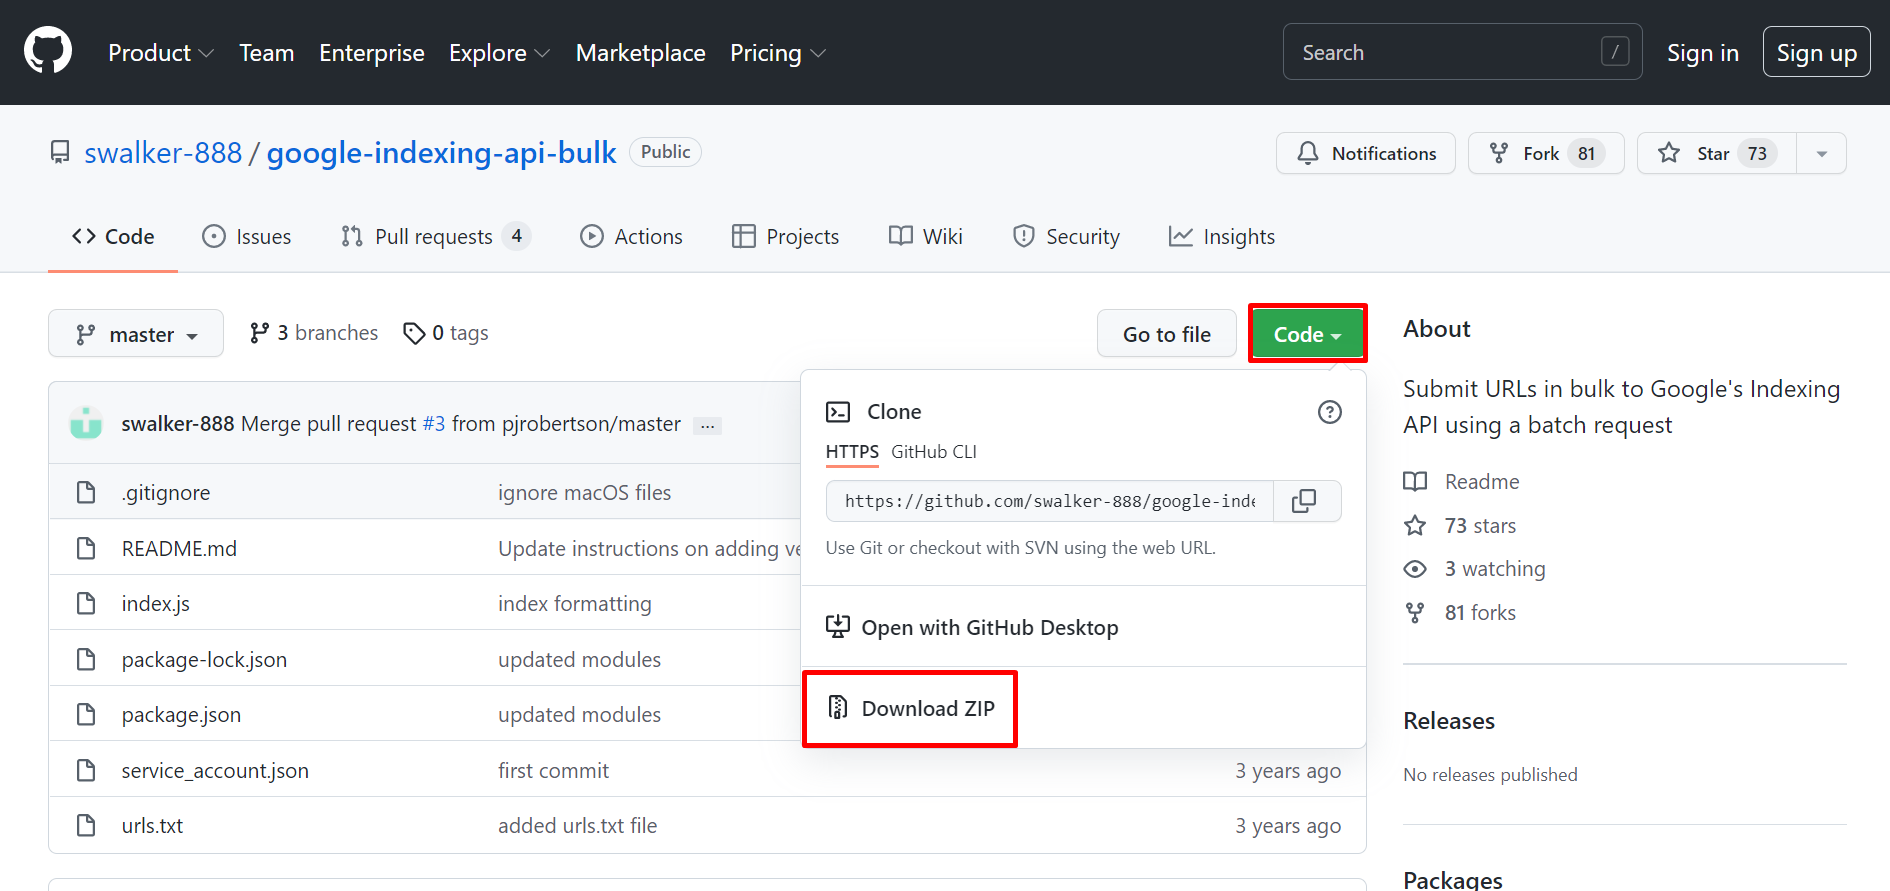
Now you need to download the script for desktop. With the help of it we’re gonna interact with Google Indexig API. Follow the link to download the script: github.com/swalker-888/google-indexing-api-bulk.
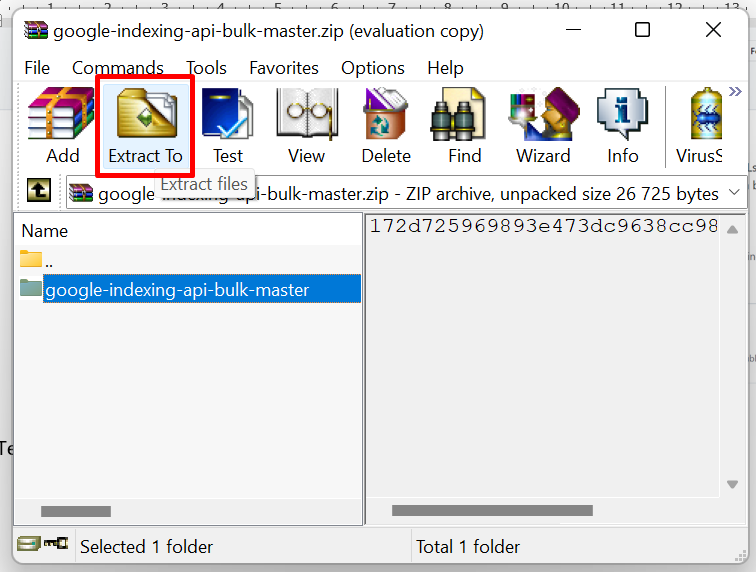
To download the script after you click on “Code” and select “Download ZIP” in the pop-up.
You need to extract the folder from the archive. Select where you want to save the folder and click on “Extract”.
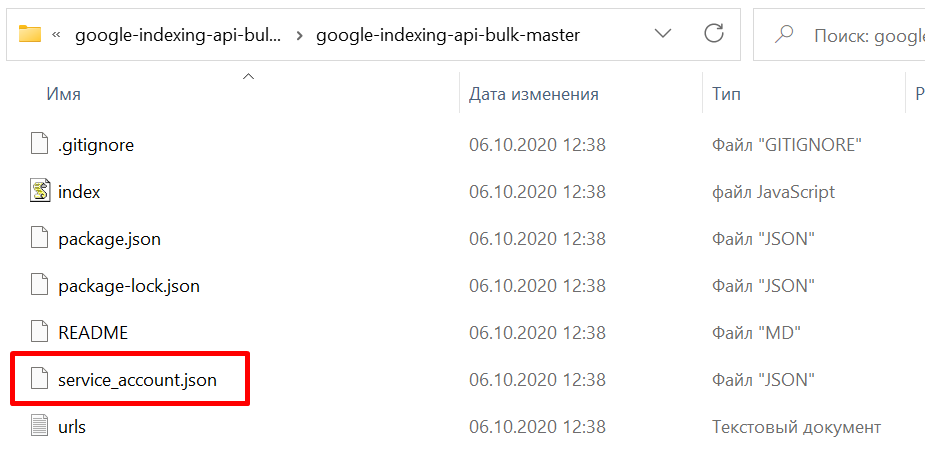
Then you need to find “service_account.json” file in the folder.
Note
JSON type files can be opened with basic Notepad or Notepad++.
So we need to change the content from that file to the one from our JSON-key.
Before:

After:

Save the file and that’s all. We linked your script with your service account, which is already linked with your web-site trough Google Search Console.
Now you need to download and install node.js for your script work. Follow the link: nodejs.org/en/download/. Download a version for your OS and install it.
Running and using the script to reindex pages in Google
Now let’s find out how to use the script, that we prepared.
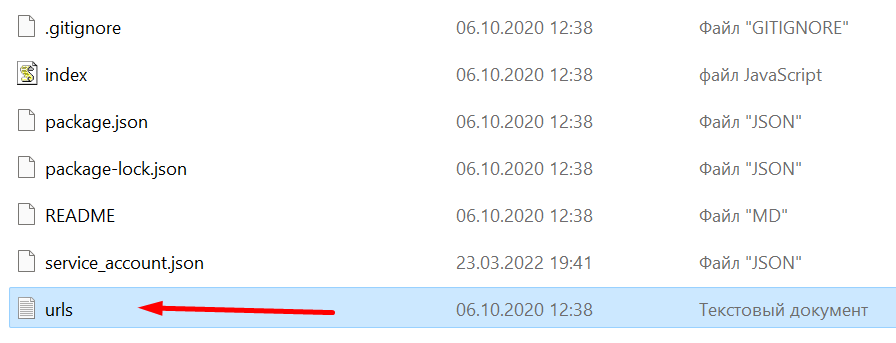
There is a “urls” document in the folder we downloaded. You need to paste up to 200 links, which you want to reindex, in this document and save it.
Then you need to launch “Command line”. You can easily find it in “Start” menu. In command line you need to go to our folder “google-indexing-api-bulk-master”. In my occasion the way is: Desktop – “Work” – “google-indexing-api-bulk-master”. That’s how you find it in the command line.
Note
In order to move to another folder you need to use “cd” command.
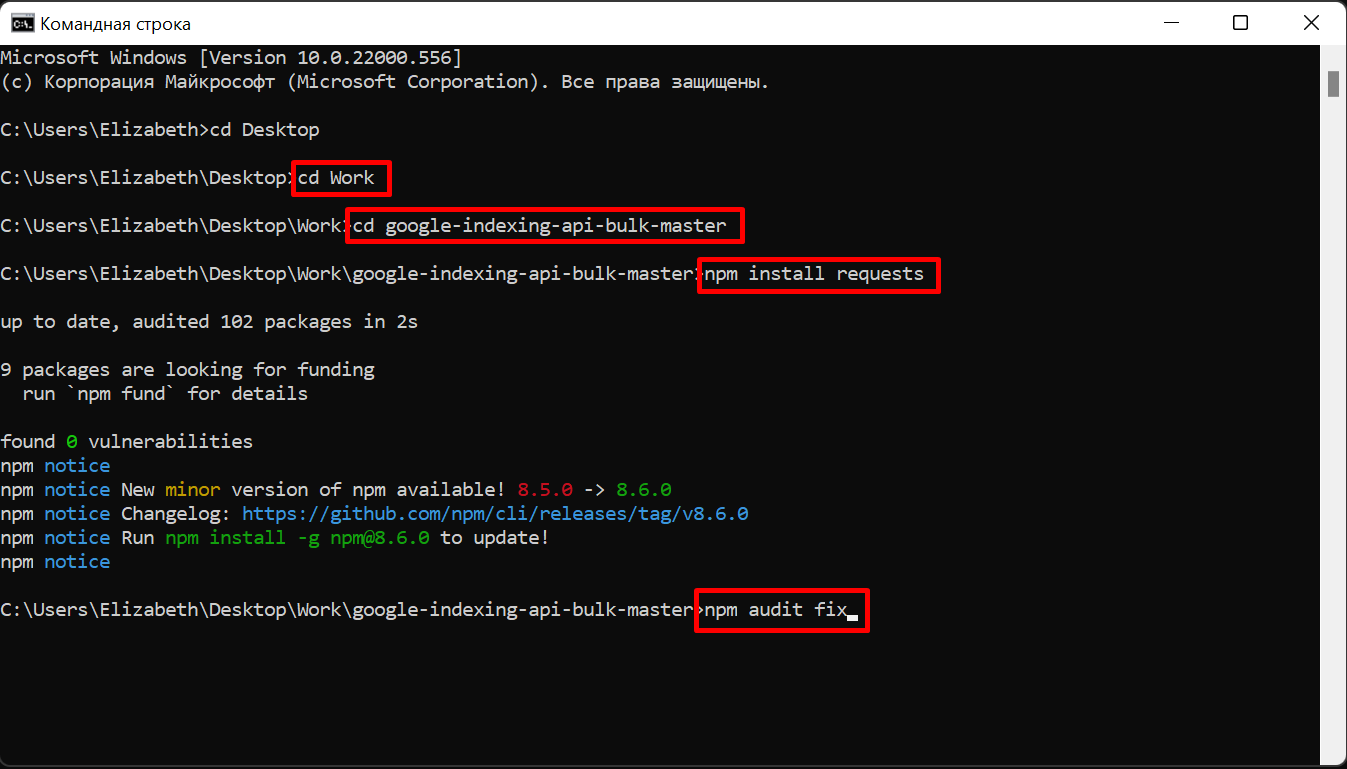
Now when you opened your folder, you need to upload files from library. You can do it using the next commands:
- npm install requests
- npm audit fix
- npm audit fix –force
All we need to do now is to launch the node index.js command.
If you did everything right: your node.js is set and the library that accept such requests is installed, – you’ll a similar picture:
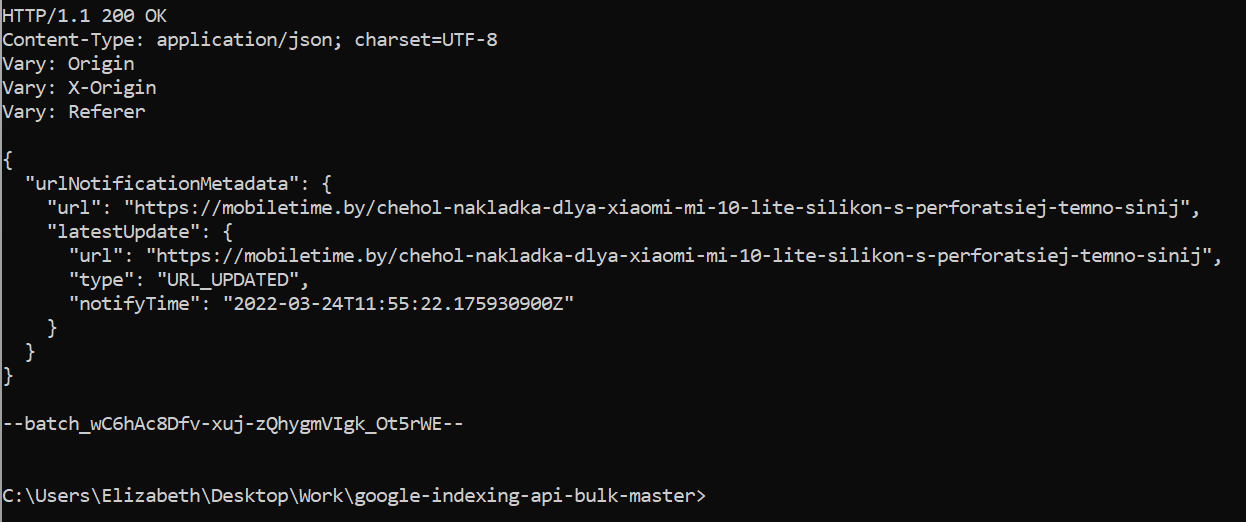
If you see something else, you need to check everything you did earlier and fint the moment with a mistake.
That is all. All the stages are finished. Then you won’t need to redo all these steps. The only things you’ll need to do are:
- Edit “urls” file. Replace the old links with the new.
- In command line you open “google-indexing-api-bulk-master” folder and run node index.js command. I’ve got prepared commands saved in a document:
- cd desktop
- cd work
- cd google-indexing-api-bulk-master
- node index.js
- If you want to reindex other web-site’s links, you’ll need to update JSON key.
Conclusion
So today you learned how to reindex 200 URL-s a day. Instead of the script from the article you can use various plugins for CMS.
For example:
- WordPress plugin with instructions: rankmath.com/blog/google-indexing-api/
- OpenCart plugin: opencartforum.com/files/file/8960-google-indexing-api/
Thanks for reading. Would be glad to answer all your questions in the comments.
We can set the script for your site turnkey for a little fee (distantly using TeamViewer) Contact us on agencyagvento@gmail.com or Telegram us.