How to increase the effect of link promotion of your website and monitor it, what tool to use
In this article I’m going to tell you about such a good tool as Linkbox and its features. There is a detailed review of what monitoring instruments the tool can offer in the first part and a step-by-step guide (checklist), how to use all backlink monitor tools and how to improve the effect from backlink promotion using this tool.
For what reason should you use the Linkbox tool to track backlinks? Well…There are some simple reasons:
- Backlink promotion takes a significant part of website promotion strategy. The more effective backlinks are, the faster will increase your website ranking in Google. Therefore, it is necessary to monitor and conduct their analysis competently.
- Checking the indexing and monitoring quality of backlinks that you have ordered from a freelancer, SEO specialist or studio. There is a possibility that you may be scammed and get backlinks that will not help much in SEO optimization and website promotion. For example, they cannot be indexed by Google Search engine robots.
- You can offer this tool to your SEO specialist so that they can monitor the tips from the article and increase the effectiveness of backlinks or use it to monitor all backlinks on your website.
- In general, new backlinks indexation takes a long time, so you can help them and speed up the process using the “Index Backlinks” function.
If after that you decide that you want to improve promotion strategy of your website and SEO generally with the help of this tool, then let’s go to the essence of this article.
The best backlink tracking and SEO improving tool Linkbox review
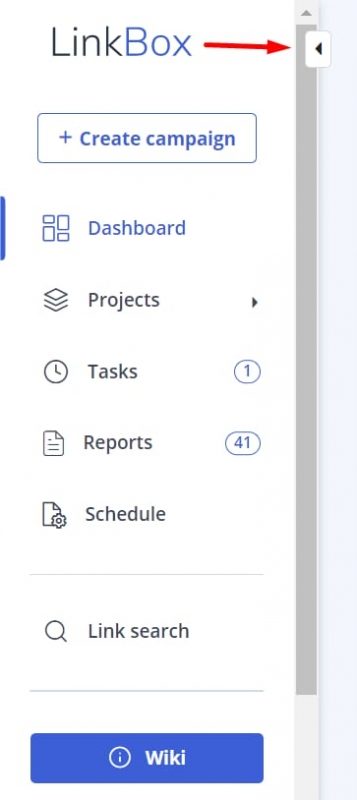
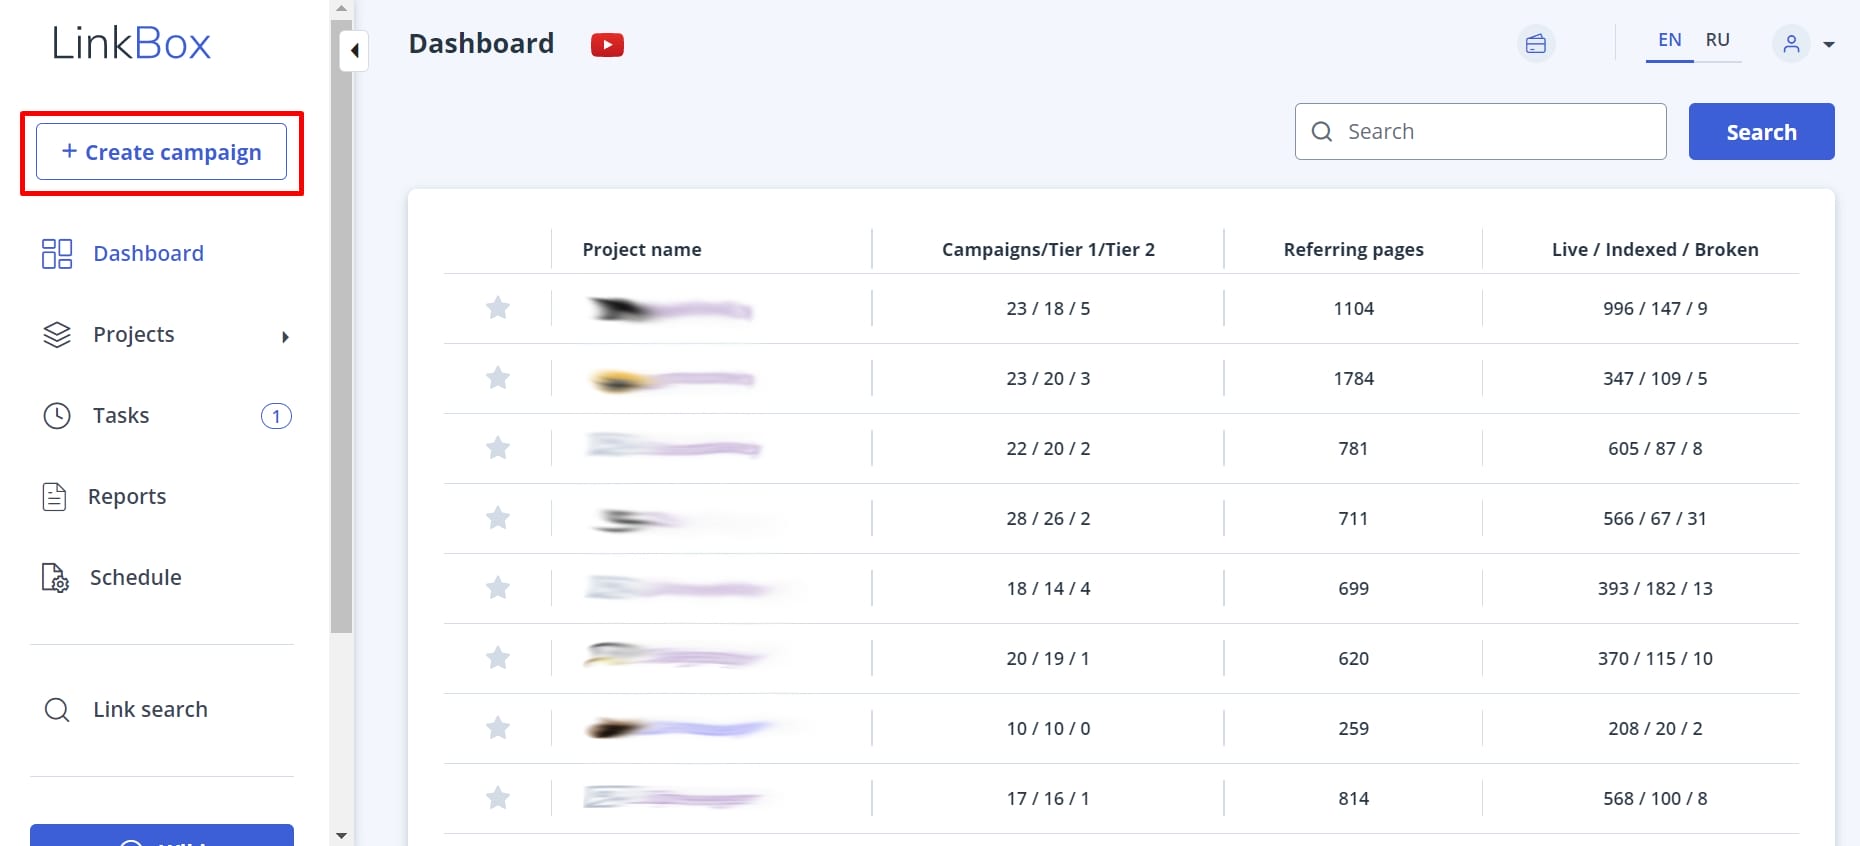
So, let’s see what this tool provides for monitoring backlinks: what sections and functionality it has. All sections are on the screen on the left in the menu, which can be hidden to enlarge the area. To do this, just click on the arrow icon as shown in the picture on the left.
There are five main sections: Dashboard, Projects, Tasks, Reports, and Schedule. In addition, the menu contains a “Create Campaign” button that allows you to create a new project or campaign to monitor. There is also a section “Link search”, the purpose of which is clear from the name. And at the bottom of the section “Wiki”, where you can find answers to your questions about the Linkbox tool , video lessons, case studies, and more.
Let’s take a closer look at each tool.
1. Dashboard
Let’s start with the “Dashboard” section. Here you can find general information on all your websites for which you track backlinks and improving SEO.
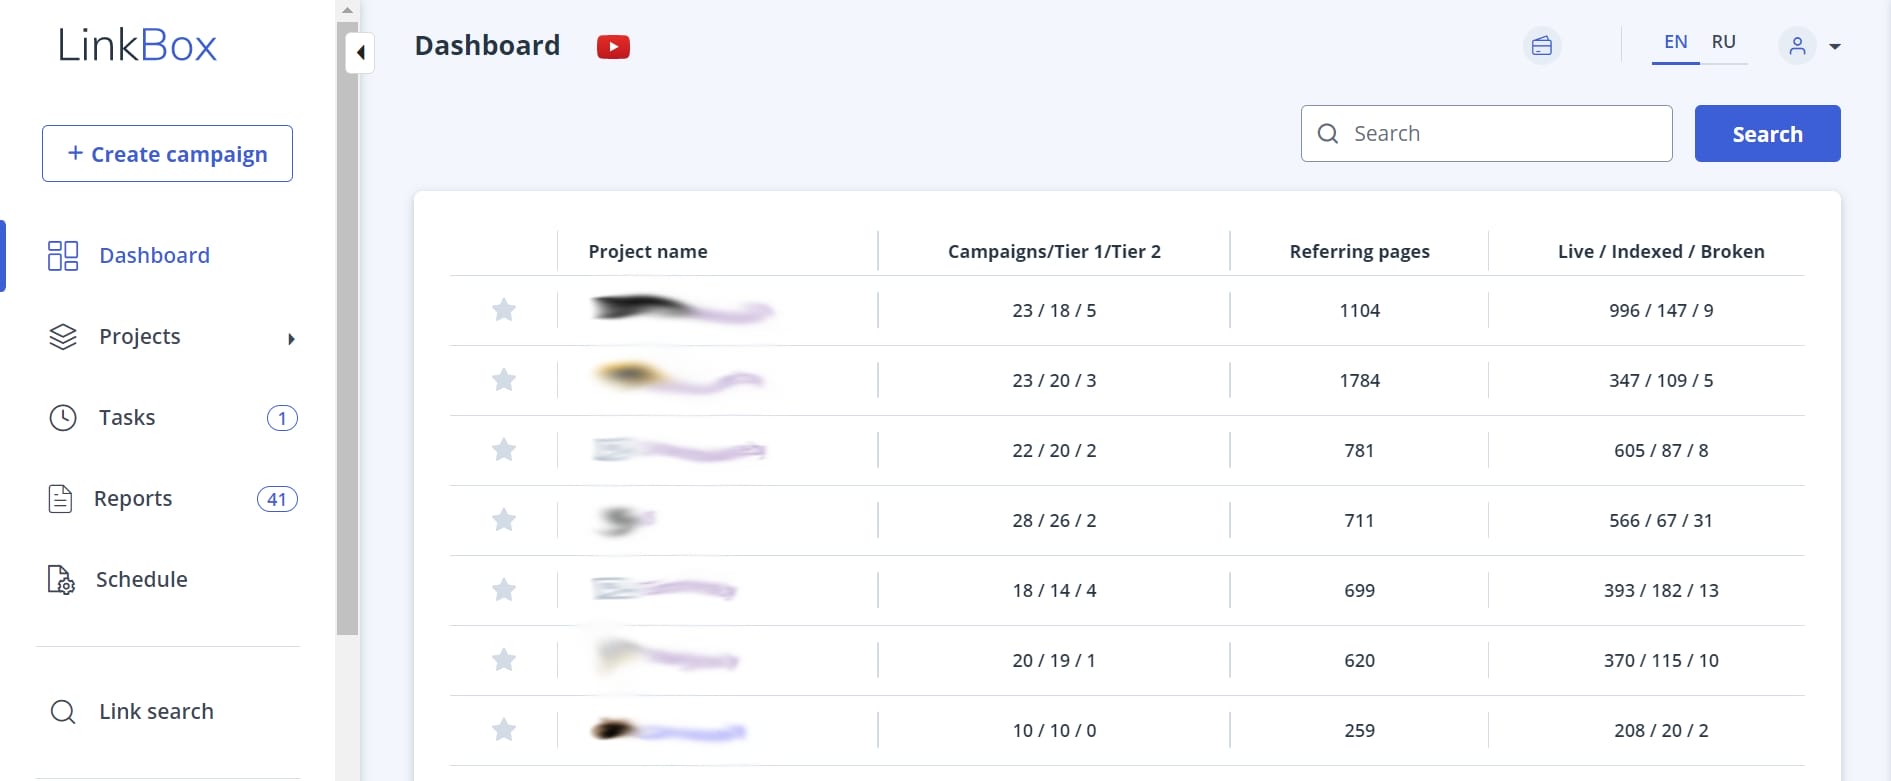
Let’s start in order and figure out what’s in each column of the table.
In the very first column you can select the sites that will go to the favorites. (To monitor them faster)
After that is the “Project Name” column. Obviously, here is the name of projects for which you monitor backlinks, and to be more exact, these are the sites for which you do link promotion.
Next is the “Campaigns/Tier 1/Tier 2” column. Here is information on the number of campaigns in the project. For example, it says 16 /14 / 2. This means that a total of 16 campaigns were created in the project, of which 14 campaigns for tier 1 links and 2 campaigns for tier 2 links.
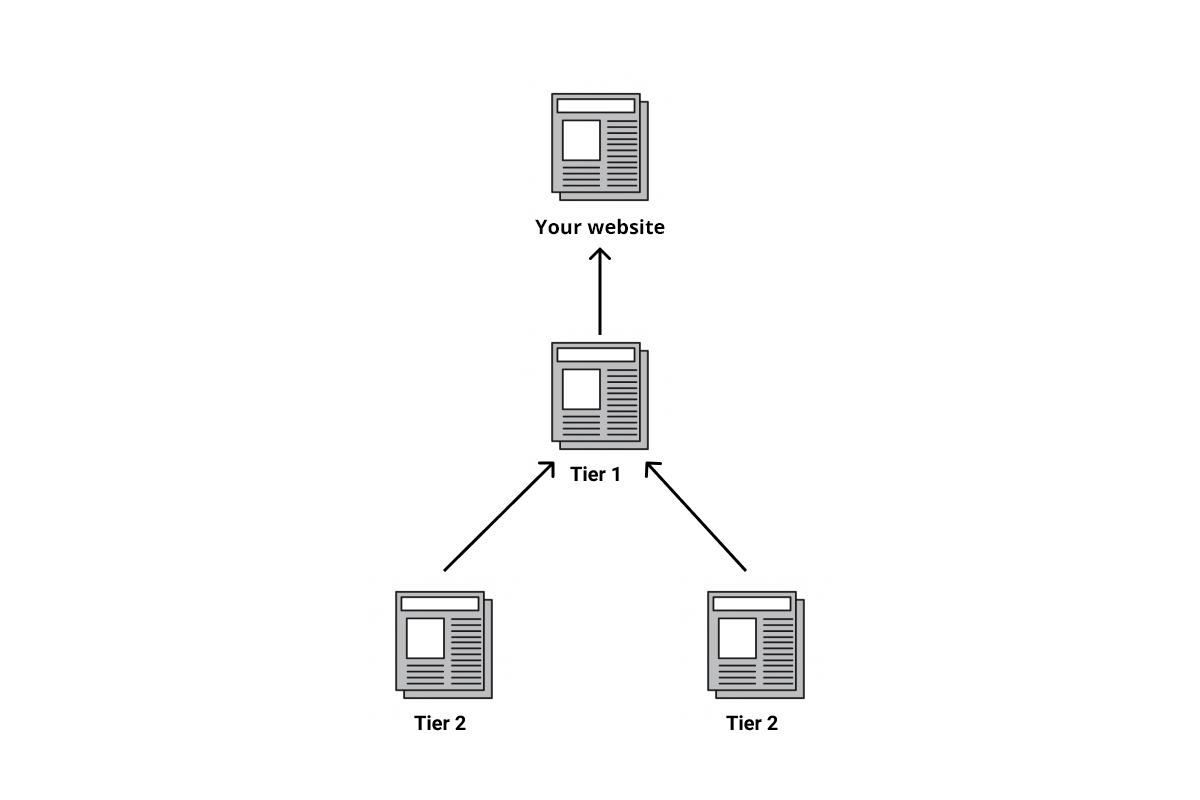
Information. Tier1 are the backlinks that lead directly to your site. But tier2 lead to the pages where your tier1 is located.
The next column is called “Reffering pages”. This one is simple. It contains information about the total number of backlinks in the that you monitor.
It is followed by the column “Live / Indexed / Broken”. As you can guess, “Live” – are backlinks that refer to the working pages. To be more precise, backlinks with an responce code, for example, 200, which means “Successfully. “Indexed” – this is the number of pages that are indexed, and “Broken” – these are pages that, of course, do not work. For example pages with an error 404.
Above the table is a search box to quickly find the site you need.
2. Projects
Go to the projects section. After you click on this section, a new window will appear in which you need to select the website you are going to monitor now.
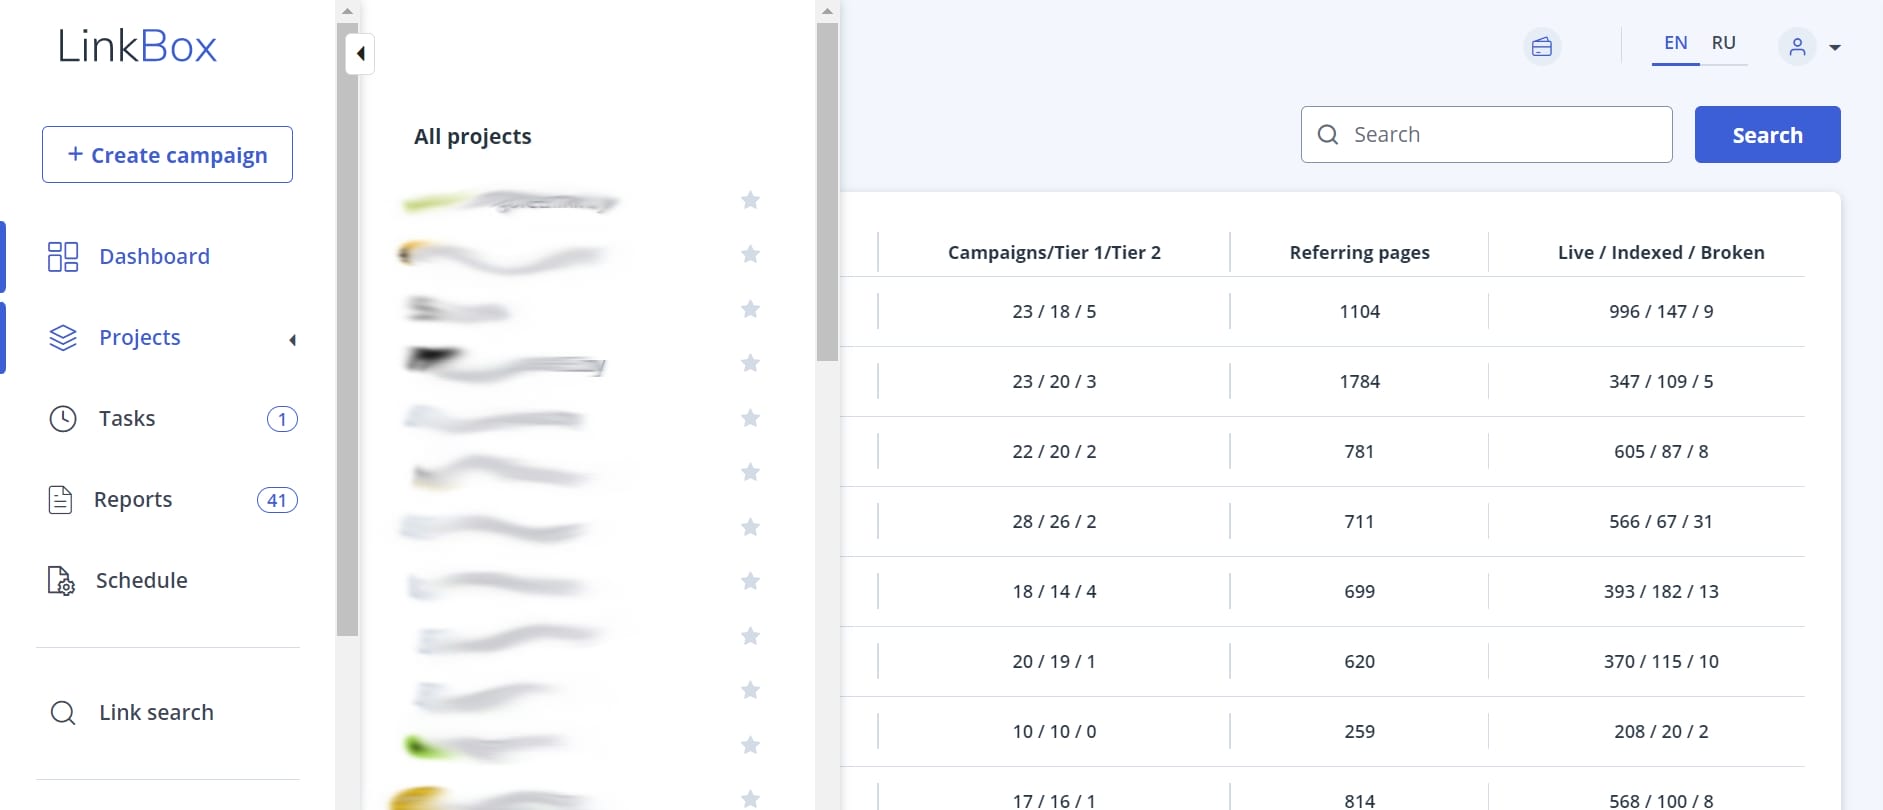
Go to the project you want. To do this, just click on its name.

Now let’s go through everything on this page in order.
- Here you can choose for which type to show: tier 1 or tier 2.
- The drop-down list contains all campaigns that are currently created for the site.
- A button that can be used to add new backlink.
- You can enter a backlink partially in the field and filter by this parameter.
- This field is used to filter whether there are backlinks to your site or not.
- Here you can select which tasks have not yet been done and filter by this parameter.
- In this field you can put filtering on intersection with other crawlers. That is, you can analyze what links can see competitors (for example, using ahrefs).
- This field will help you make a selection from the response code.
- Here you can select indexed or unindexed backlinks and show only one thing.
- Here you select the possibility of indexing, which means that the page is allowed to index or not.
- Press this button to reset all the selected parameters.
- The “Filter” button is used to apply all the selected parameters and filter everything out.
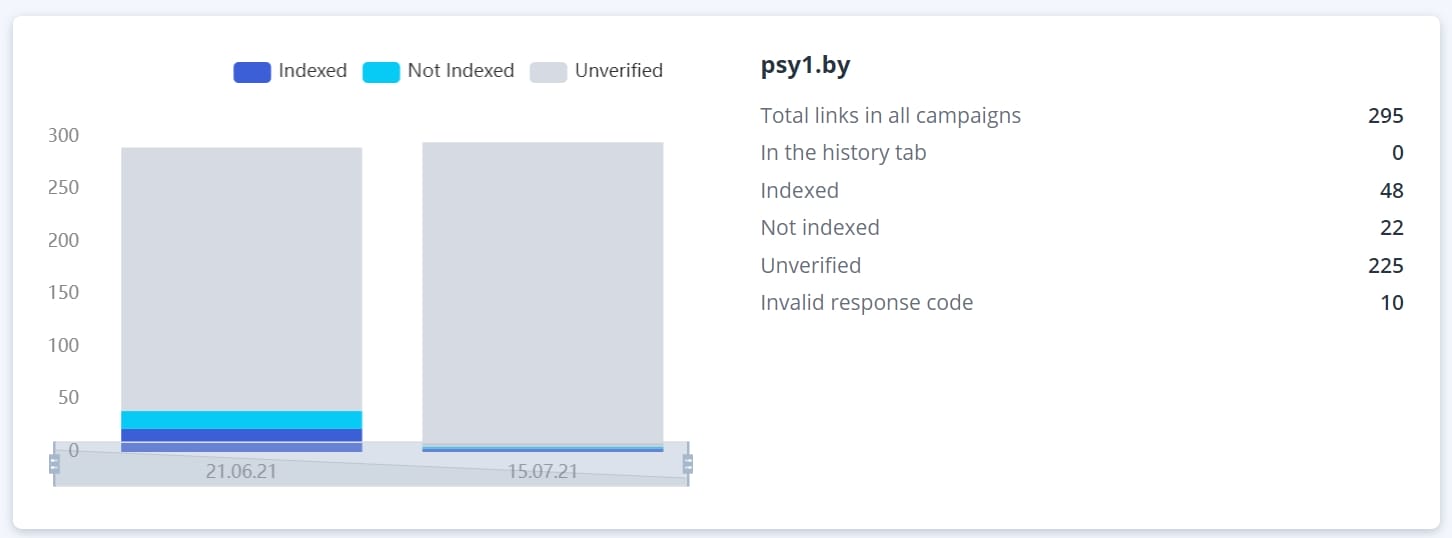
Move down the page and here you see a histogram for the selected project and data in the form of text with general information about the links in it. The histogram displays information after each indexing check in the project, this data includes a graphical display of the number of indexed backlinks, unindexed and unchecked. To the right is written general data on the project at the moment.
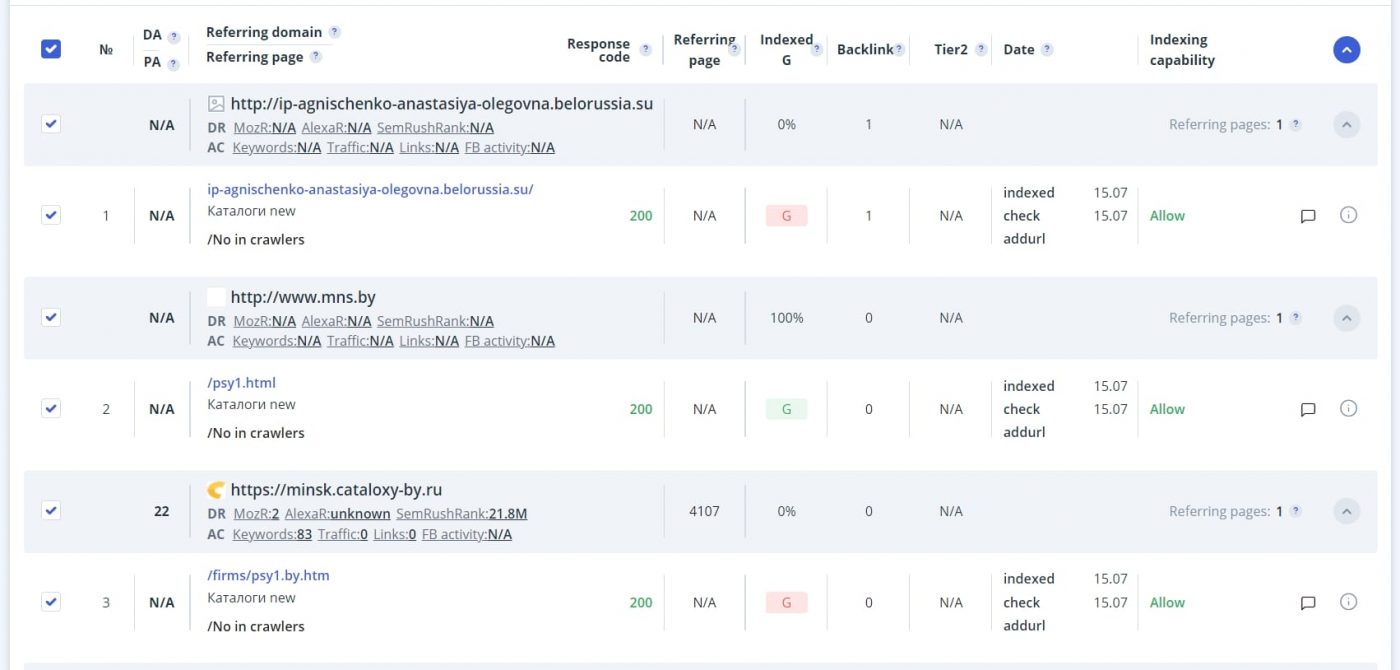
You go on and see the information on each backlink individually: the domain rank of various resources and tracking search traffic on the page, the response code of the scanned page, the number of donors referred to the service semrash, whether the backlink is indexed by google, the number of anchors on the page, the presence of backlink such as tier 2 on the page and the indexing capability.
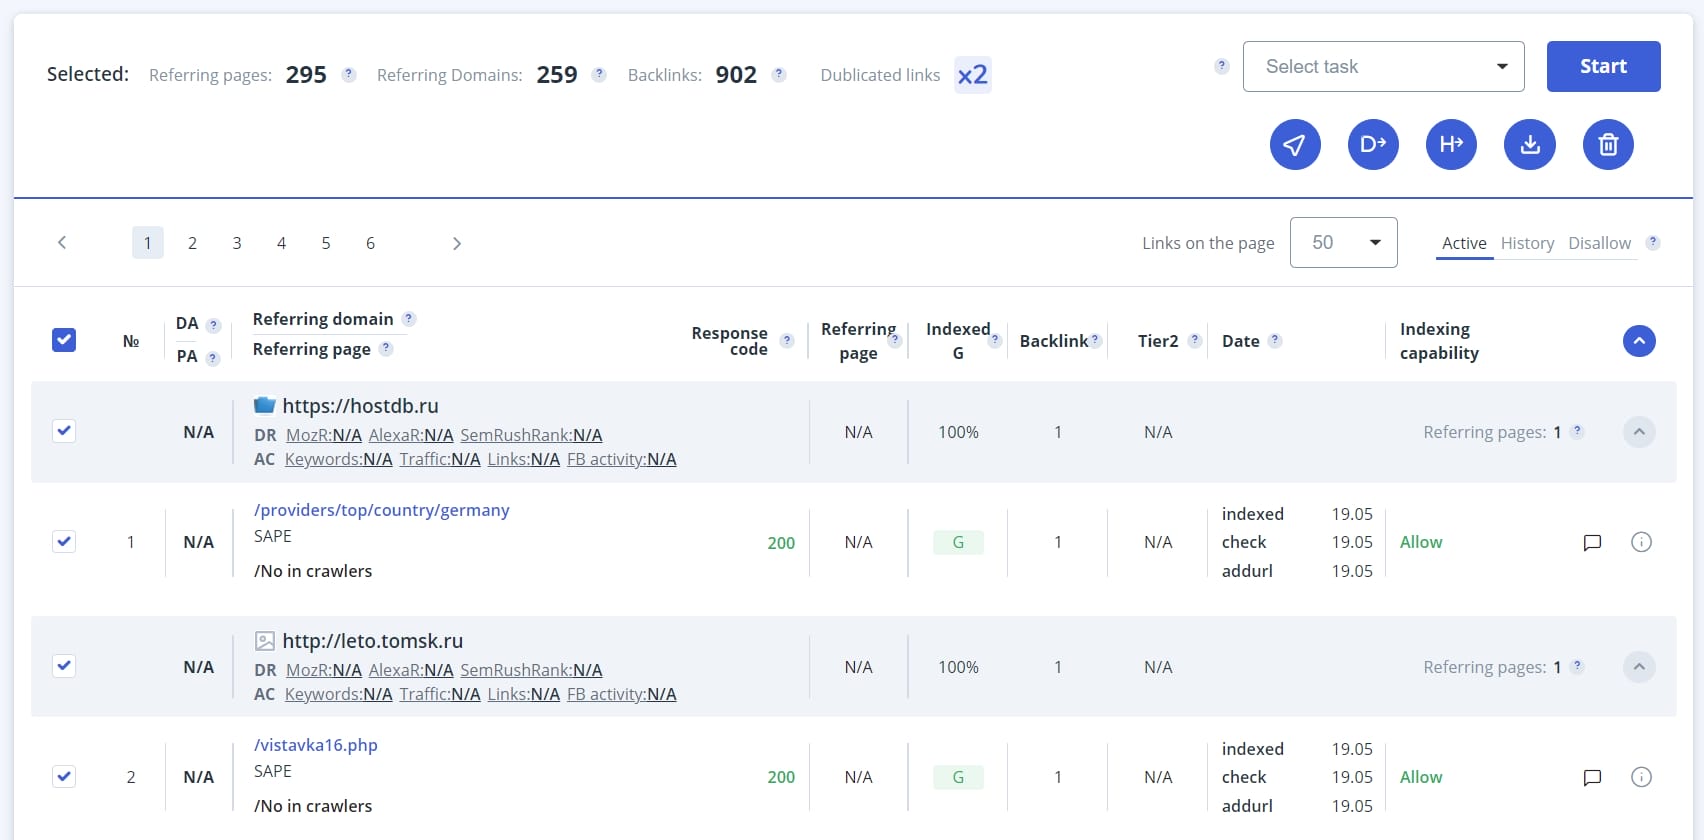
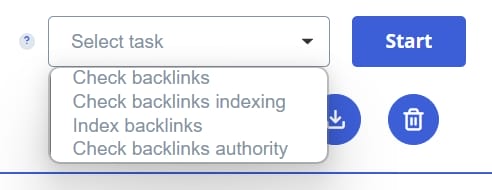
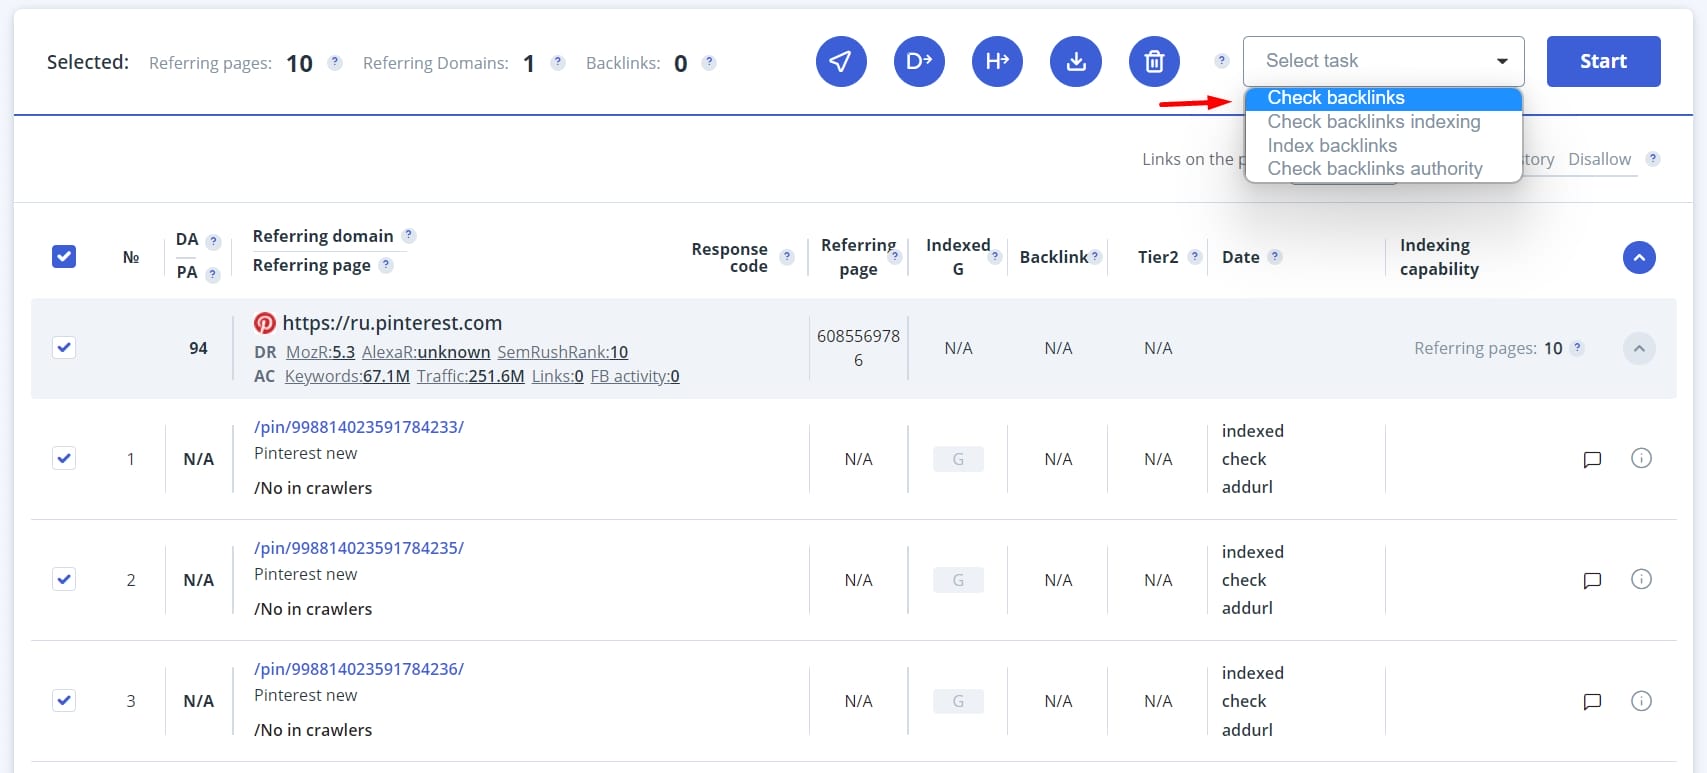
In order to get this data, you need to select one of the tasks for the selected links. There are a total of four tasks: check backlinks, check backlinks indexing, index backlinks, check backlinks authority. For more details on how to use this, see the step-by-step guide below.
Example of what to do with backlinks after posting (purchase)
Sign up in linkbox for freeStep 1. Create a project
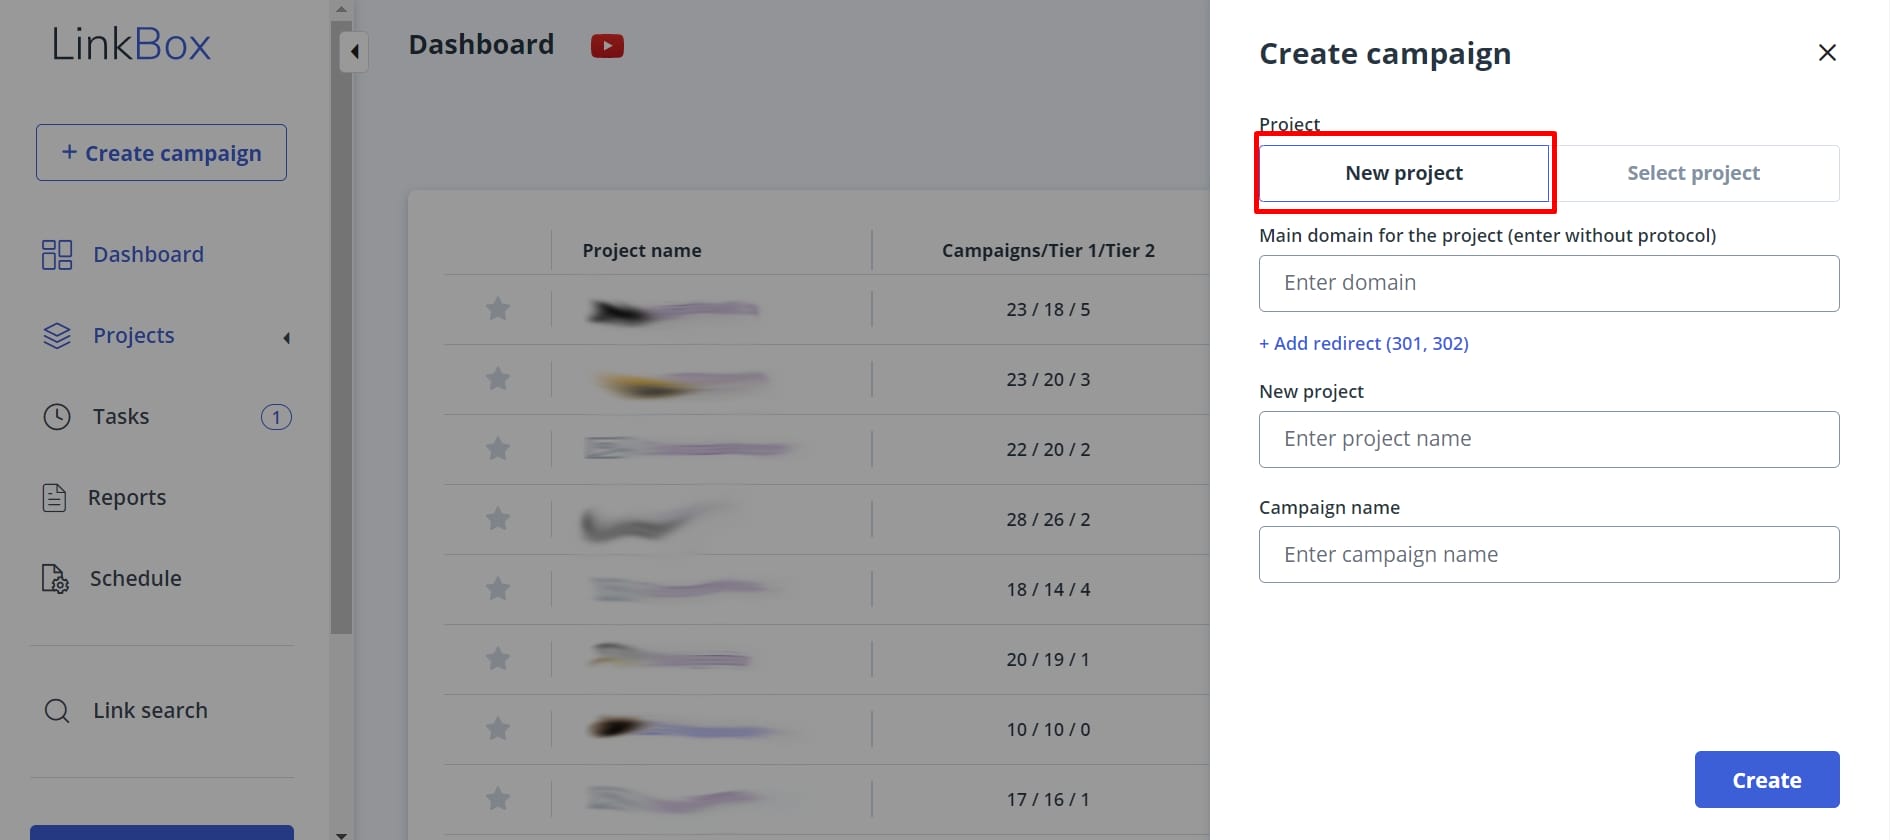
First of all, you need to create a project for a website you want to monitor. To do this, click the “Create Campaign” button.
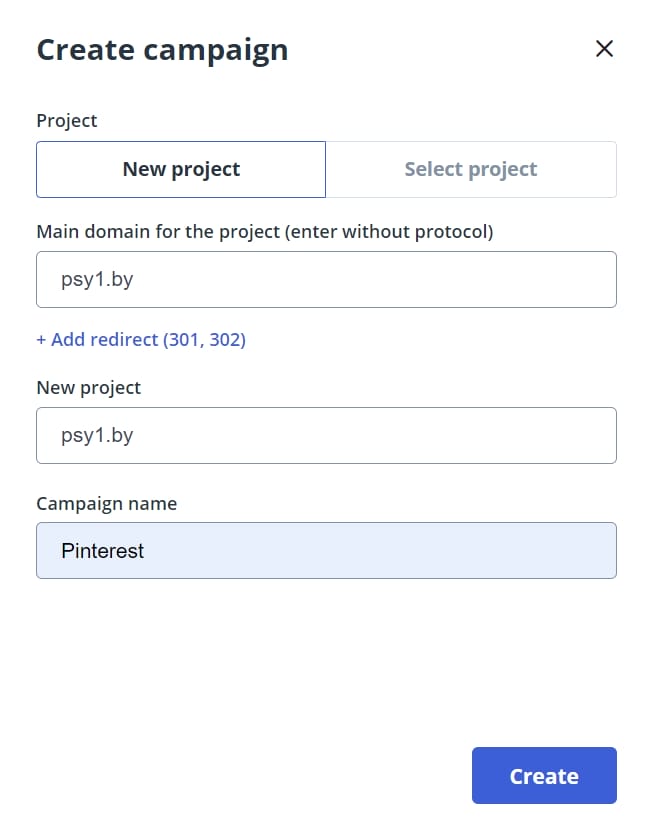
After that, a box will appear on the right, where you need to select “New Project”. Fill in all the data (or just the main website domain and campaign name) and click “Create”.
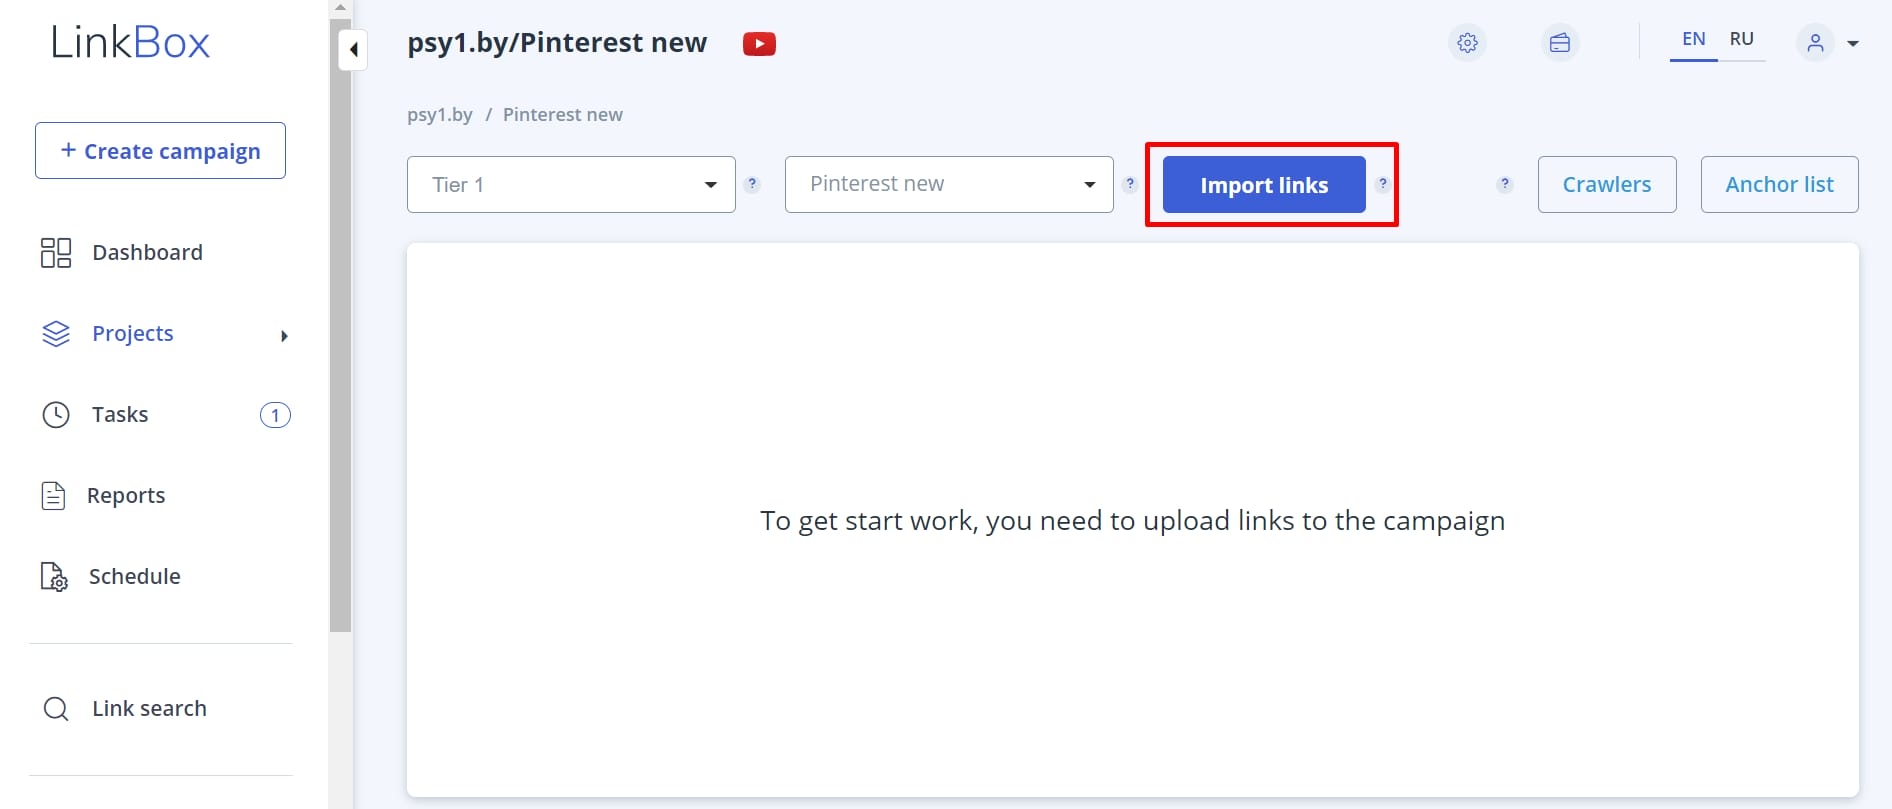
Next you get to the “Pinterest new” campaign page for psy1.by. As the page itself suggests, you need to import backlinks, since there are currently none in the campaign for this website.
Step 2. Import links
In order to import every backlink and domains you want, click on “Import links” button.
In the window that appears, insert the backlink (or a number of them) you want in the text box. Each backlink on a new line. And press “Confirm”.
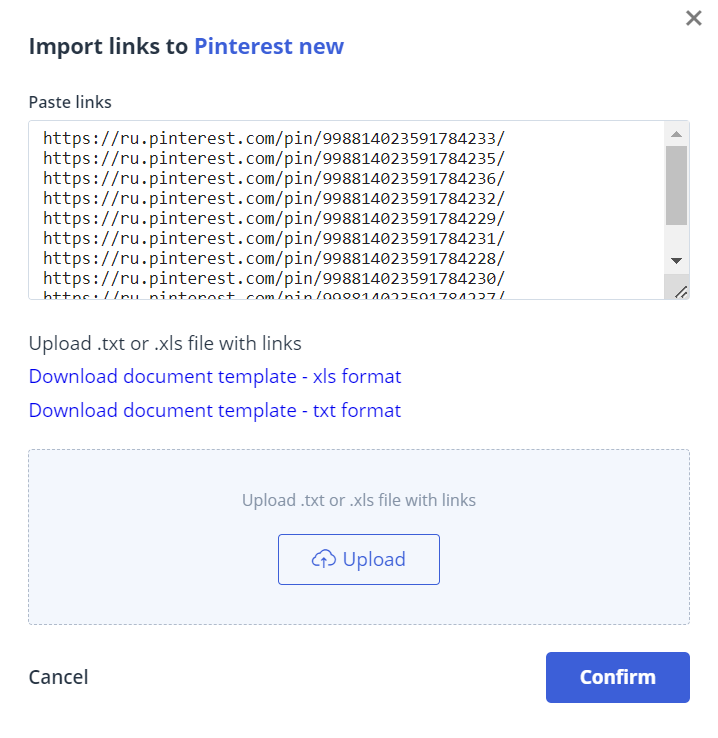
As you can see this is not the only way to import backlinks. You can also import them using a .txt or .xls file. The format of the document is the same as when you upload them through the text field of the tool: each backlink is written on a new line.
A notification in the upper right corner of the screen will inform you that the action was successful.
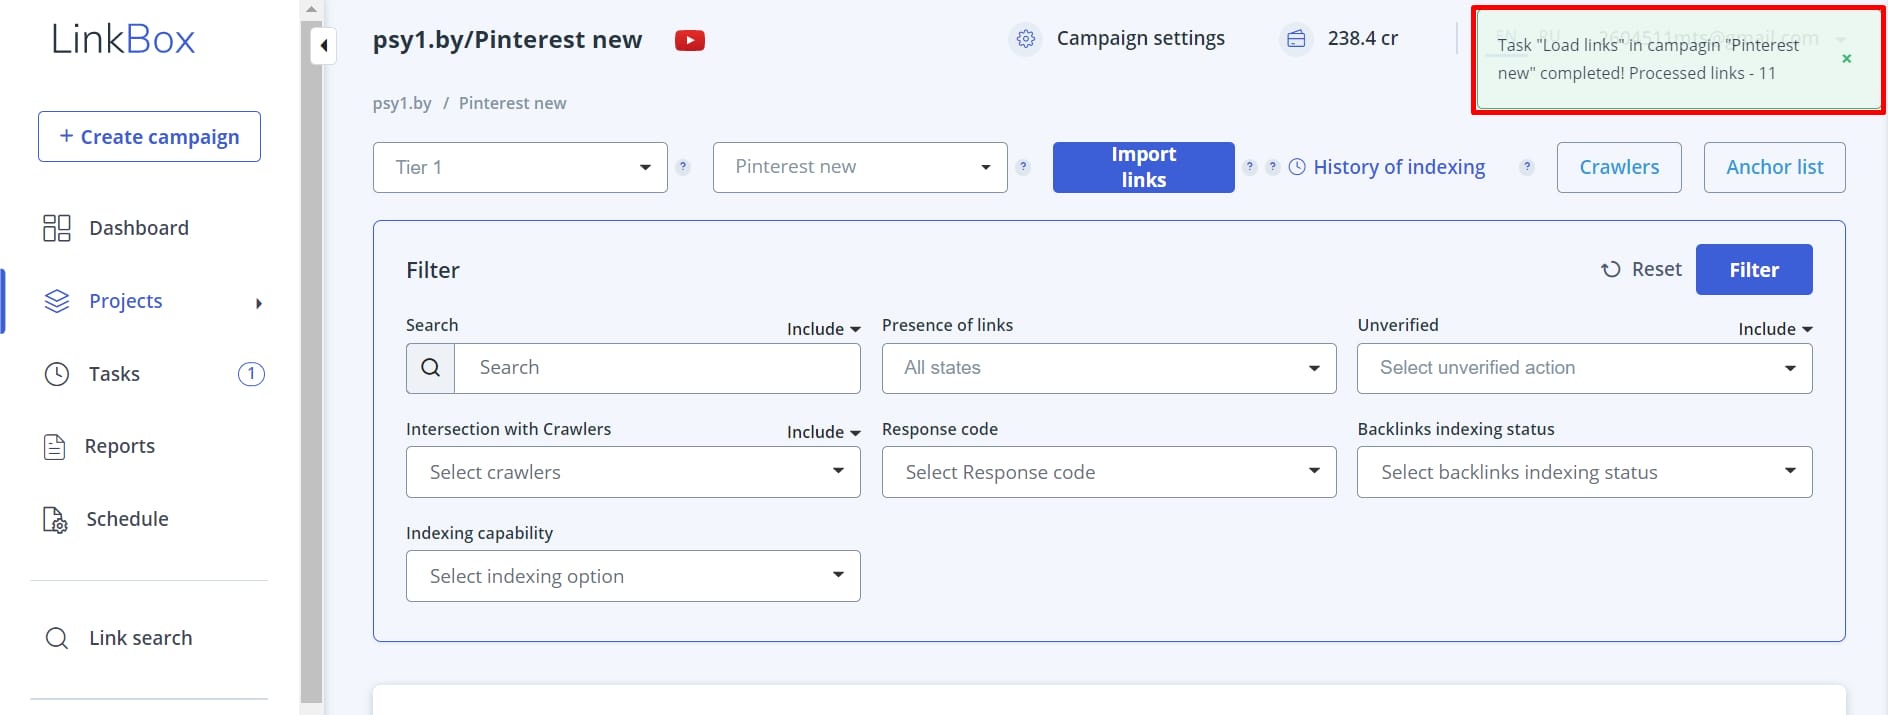
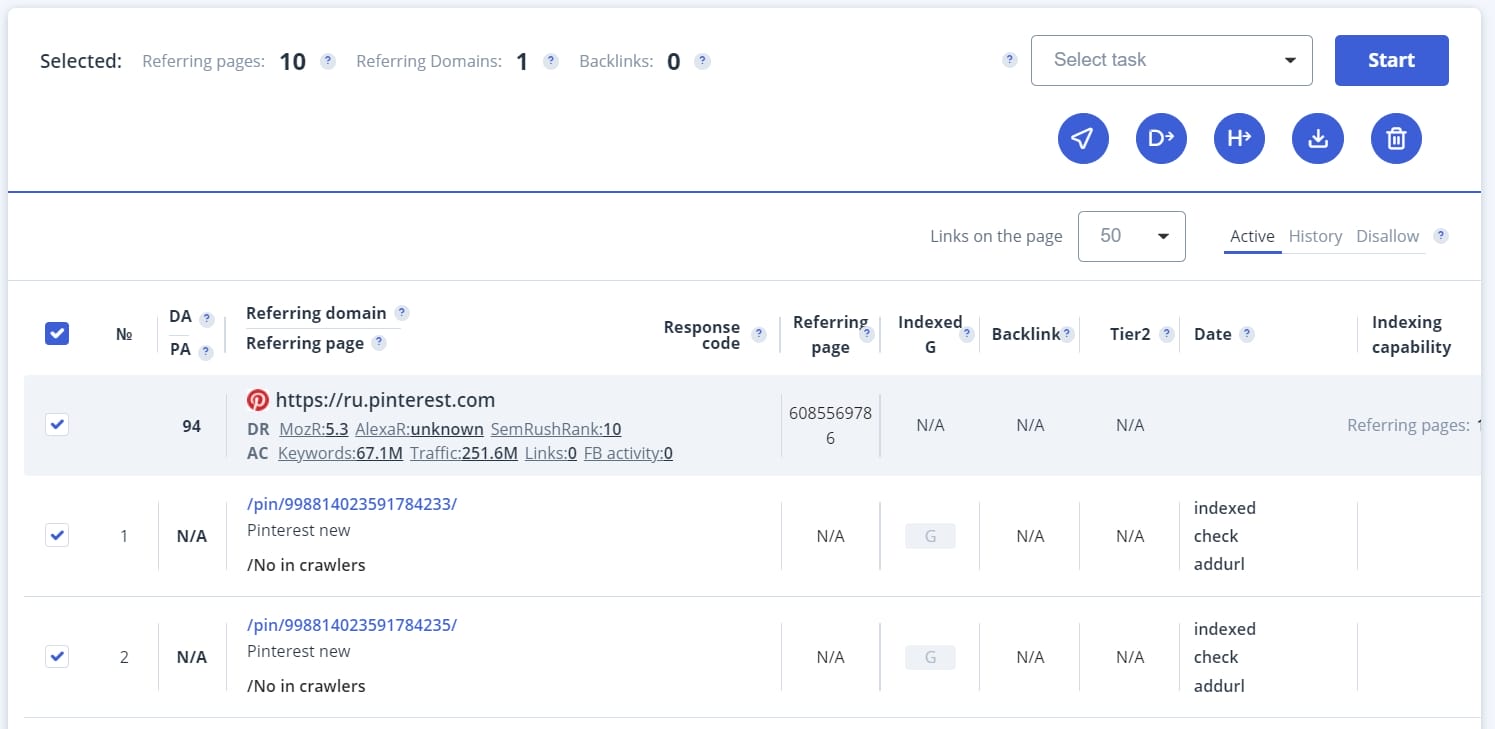
Scrolling down the page below, you see here the imported links for your website.
Step 3. Check backlinks
Every backlink you chose is uploaded, but you don’t have any information about them yet. And to find out something about them, you should check them, so you will analyze the link profile of your website. Let’s analyze how good each backlink is and which of them you will track and use in the future.
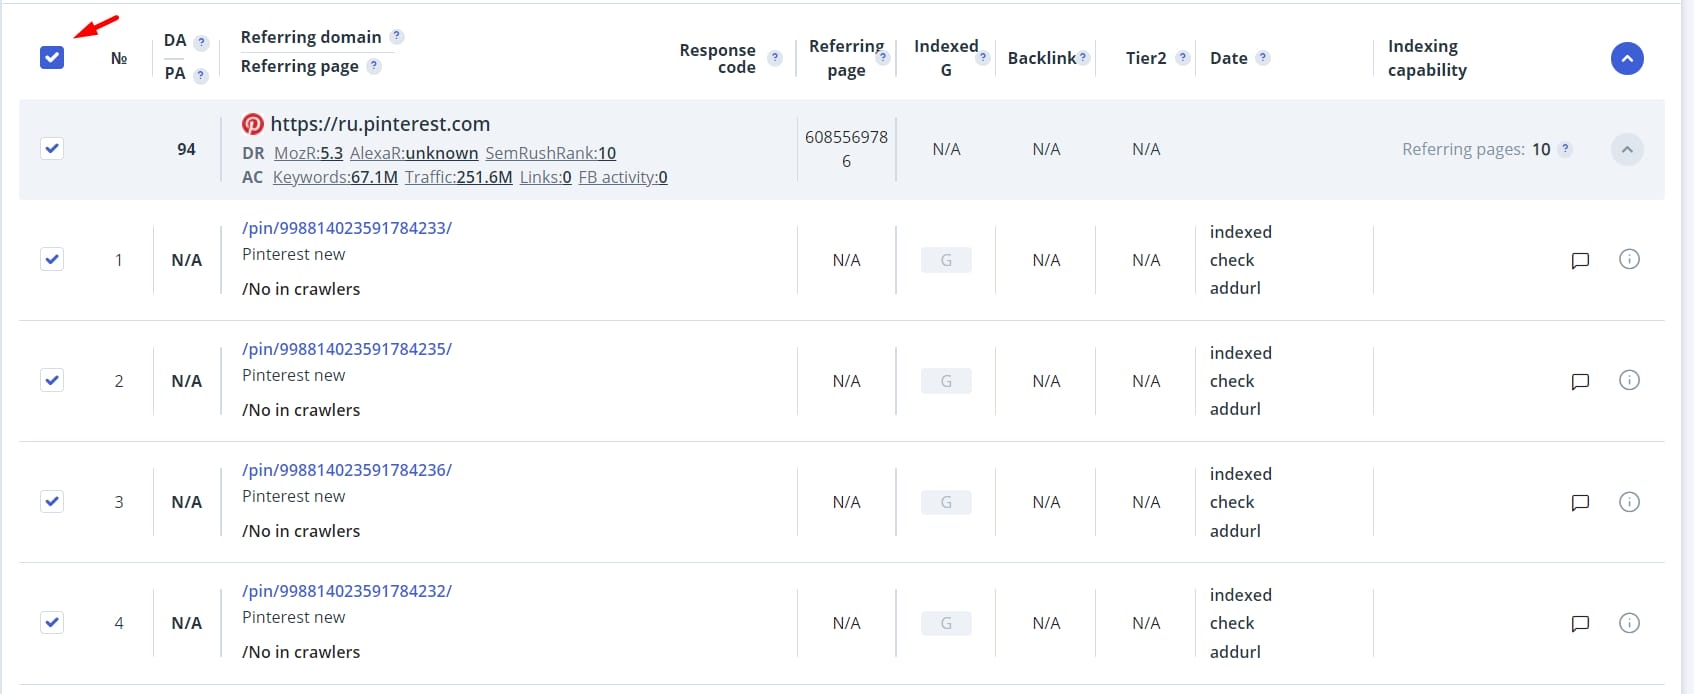
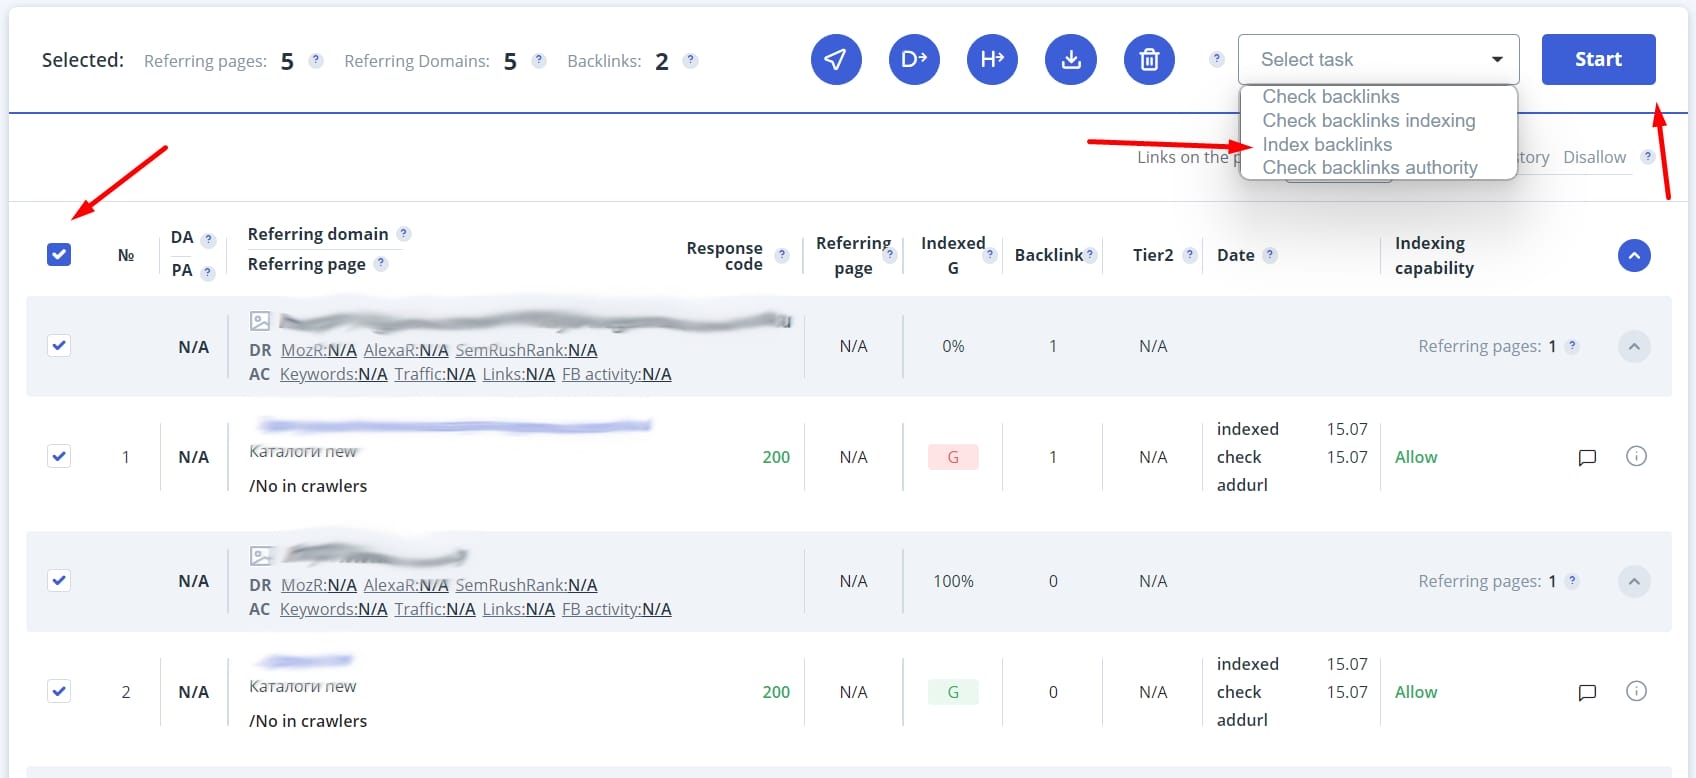
To do this, you select all your backlinks by clicking on the checkboxes as shown in the picture.
So, you have selected the links, then in the drop-down menu select “Check backlinks” and click on the “Start” button.
Then wait for the notification that the task was completed successfully.
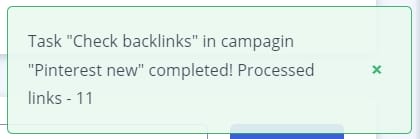
After that you have some information on every single backlink, namely the response, the number of links on the page and whether indexation of them will be successful.
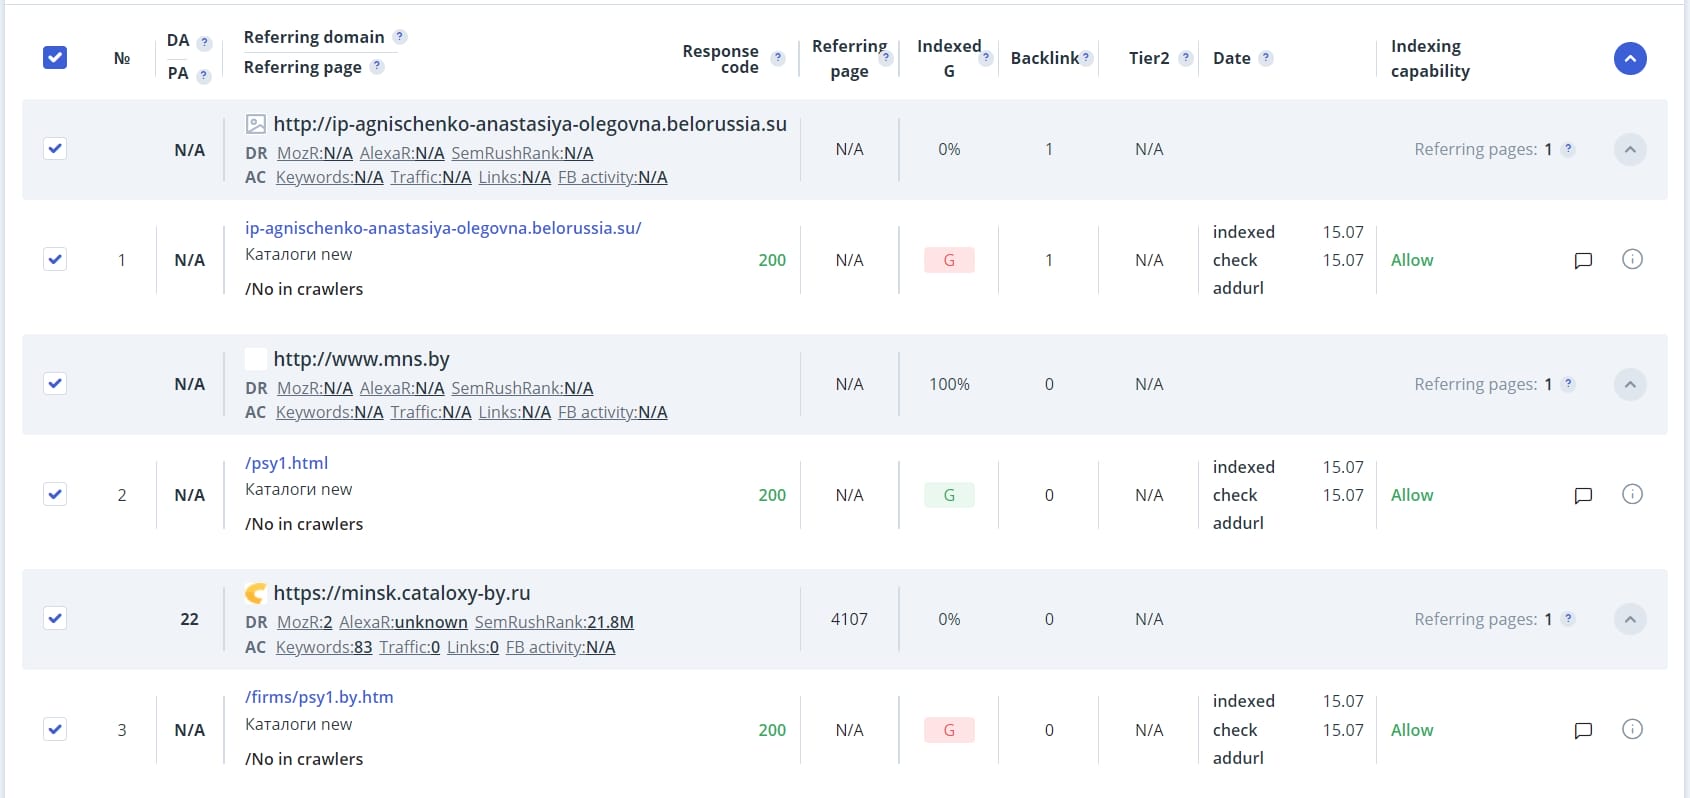
So, now you can start analyzing and monitoring the results. The first thing you should pay attention to is the response code.
The response code means the one of the scanned page. It shows if the page was loaded successfully, and if there was an error, what kind of error it was. In our case it is 200. This means that the page was loaded successfully.
Information. There are 5 classes of such codes in total, each of which has a lot of different answers. However, in the table below you can find the most frequently encountered codes when loading links into the Linkbox tool and what to do with such a backlink in each case.
| Response code | Meaning | What to do? |
|---|---|---|
| 200 | Request successfully processed | The link is useful, you will work with it in the future |
| 301 | This response code means that the URL of the requested resource has been changed | The link is useful, you will work with it in the future |
| 302 | This response code means that the requested resource is temporarily changed | The link is useful, you will work with it in the future |
| 403 | The client has no access rights to the content, so the server refuses to give a proper response. | The link is not working, you can delete it later |
| 404 | The server cannot find the requested resource. | The link is not working, you can delete it later |
| 500 | Internal server error | The link is not working, you can delete it later |
| 503 | Service not available | The link is not working, you can delete it later |
Next, lets consider the “Backlinks” column. It shows every backlink to your website on the current page, but it does not find all the backlinks. For example, if one is added through a JS script.
And another important column is “Indexing capability”. Here is information about whether the page can be indexed at all. In our example it says ” Allow”. However, there are other cases and here are a couple of examples:


Here is a table with the different answers for indexing capability and what they mean for you:
| Response code | Meaning | What to do? |
|---|---|---|
| Allowed | This page is allowed for indexing | The link is useful, you will work with it in the future |
| canonical | The page is indexable, but it has a different canonical address | The link is useful, we will work with it in the future |
| meta noindex or meta none | The page is not allowed to be indexed via meta tags | The link is unnecessary, you can delete it later |
| x-robots nofollow or meta nofollow | Instructing robots not to follow links on the page | The link is unnecessary, you can delete it later |
| robots.txt | The page is not allowed to be indexed in the Robots.txt file | The link is unnecessary, you can delete it later |
| N/A | This link has not been verified | Go to the beginning of step 3 and check this link |
So, after analyzing the data from the table, you can understand that backlinks that are placed on non-working pages are of absolutely no use to your website. In the future they should be removed.
Step 4. Remove unnecessary backlinks
When you know all the information about the backlinks you need to disavow unnecessary ones for your website. Why? To save the SEO budget, as well as to clean up the workspace from useless ones. There will be no changes for the better until you do it. In fact, it is very easy to understand which links need to be removed. To do this we must analyze the responses and the possibility of indexing.
Way 1: Use the tables that were given earlier. And based on the information in this table to leave useful links and remove unnecessary or unworkable.
Way 2. Everything that should be removed is written in red. For example, 404 or 503.
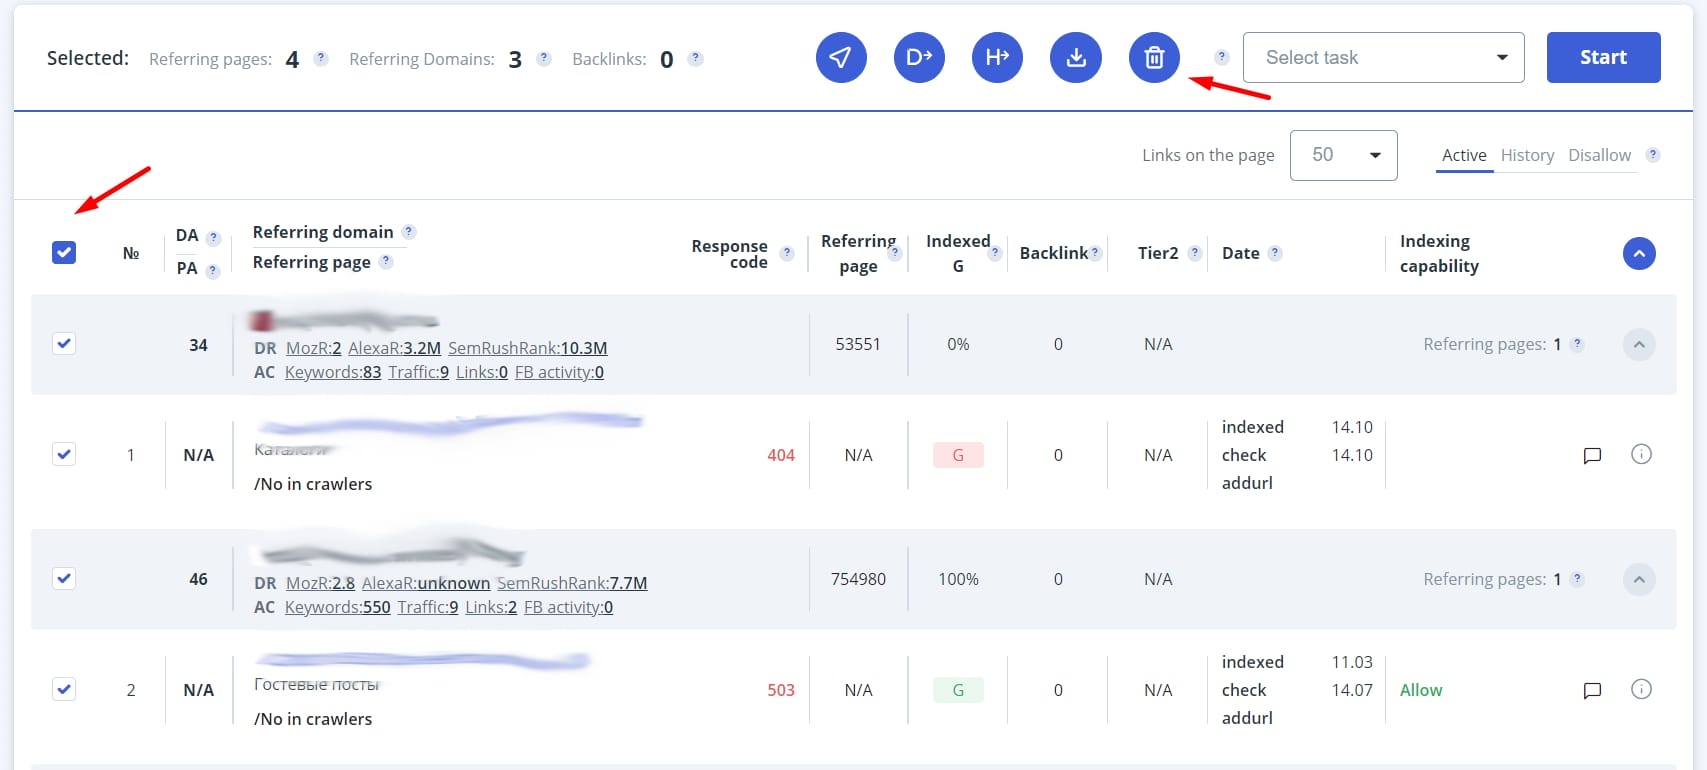
As you saw earlier, 200 was written in green. Also note that for such a backlink there is not even information about the indexing capability. So they can safely be removed ( we’ll tell you how to remove them later).
Also, you need to remove backlinks that are out of indexation, for example, meta noindex or robots.txt.
Notice that such an indexing option as “allowed” has been written in green.
So, let’s talk about how to remove everything unnecessary.
First, you need to filter them out. You choose in the field response code, for example, 404 and 500. Then you press the “Filter” button.
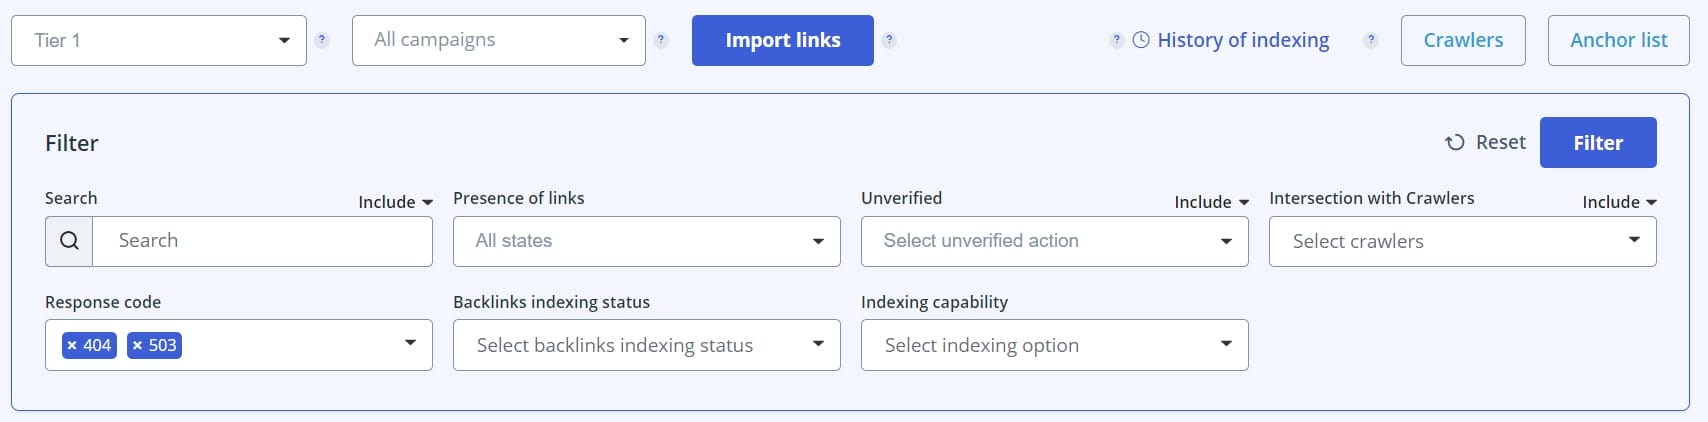
You get a list of backlinks that have a 404 or 503 codes. Now you can delete them.
In the same way you filter for indexing capability and remove the unnecessary for your website.
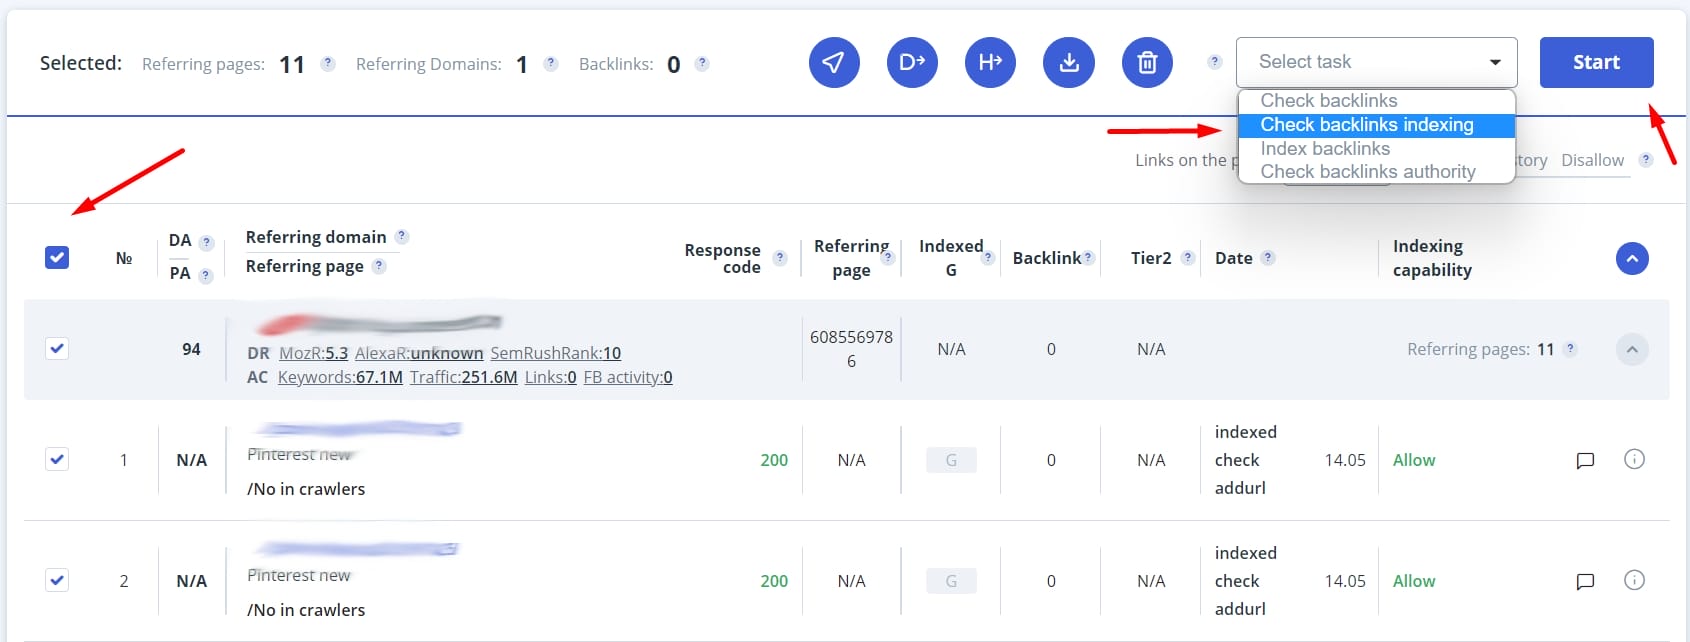
Step 5. Check backlinks indexing
After all of the steps above, you can check which links are indexed at the moment and which are not. This is also done to save the SEO budget, because it is cheaper to monitor the indexing of links than to send them to index more than 3 times. Therefore, you will sort out already indexed links.
To do this you need to select all backlinks you want to monitor, as you have done before. Then in the drop-down menu, select ” Check backlinks indexing “, and after that click on “Start”.
After that, wait for the notification that the task is done and you can see the result.
In the table, you can see the result of the check in the column “Indexed G”. As you can guess, if the letter G is green, the page is indexed, if it is red, it is not.
The overall result can be seen above the table, which is represented as a histogram. On the graph itself you can see 3 colors, dark blue – indexed links, light blue – not-indexed and gray – unverified. And to the right of the histogram is the same information, but as text. Here you see a total of 5 links uploaded to the campaign, of which 3 are indexed and 2 are not.
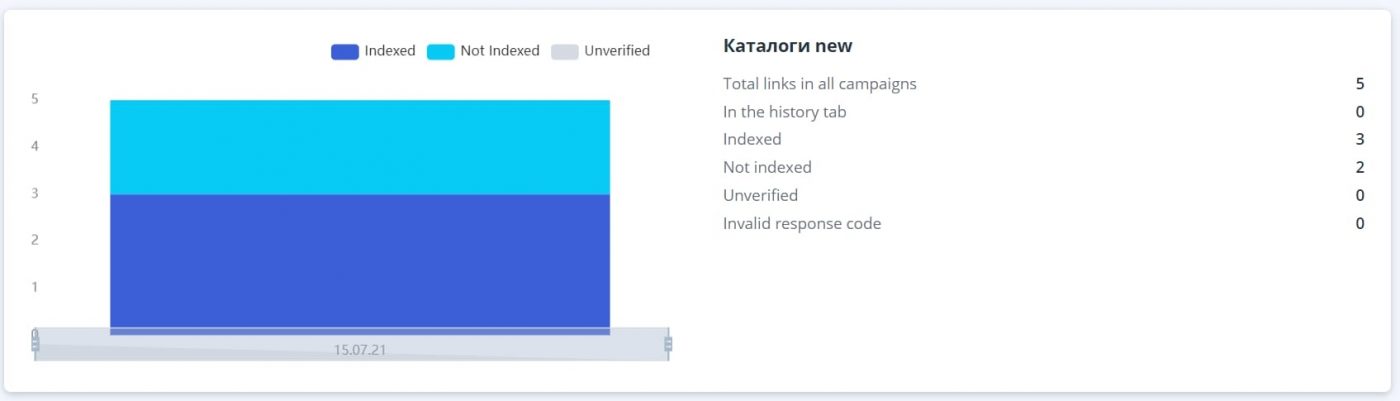
It is also worth noting that after new checks, new columns will appear in the histogram with information on the state of the links at that time.
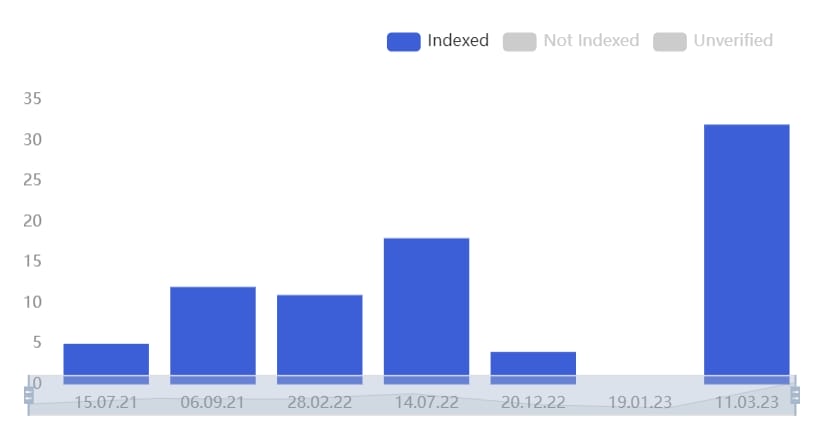
It is also possible to set which of the three parameters will be displayed on the histogram. For example, the picture below shows only indexed links. From this graph you can see how many new ones were indexed and to what extent.
Step 6. Index backlinks
Now every backlink that you have as a result and are not indexed, you need to send for indexing. To do this, first you filter them to leave only not indexed, and then sent them for indexing as shown in the picture below.
After this, an information window appears in which you must specify how many days to send these links for indexing. It also contains information about the cost of this action.
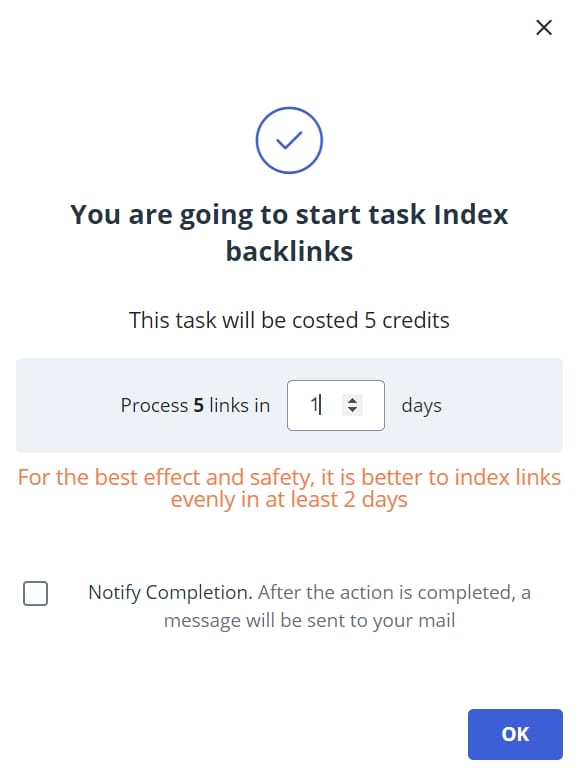
Tip 1: You don’t need to send all links to indexation in one day. The more links, the more days should be.
Update 2023
After numerous tools tests, we have concluded that this tool has very low efficiency for monitoring. We do not recommend spending your SEO budget on “Index Backlinks”.
To sum up, I can say that Linkbox is a very convenient, clear and inexpensive way to monitor link building and improve SEO as a result. At Agvento, we use Linkbox primarily to:
- Verify and monitor the quality of different link building methods: tools, freelance services, submits, and so on
- Cotrolling and monitor the link profile of a website: you can always open a project and remember what link building work has been done before and with what results.
Here I have reviewed in detail what should be done in the Linkbox tool, to increase the effect of link promotion and how to analyze. That’s all.
If you still have questions on backlink monitoring, keyword promotion or any other methods feel free to ask them in the comments. I’ll be glad to answer them.